
It seems that the pendulum has swung back to conservatism when it comes to veneer preparations.
Back in 1987 when I restored my first veneer case it was a no-prep case.1 That was the standard back then. Some minor modifications to the enamel were the order of the day for most veneer cases. We even never temporized those cases. The results were aesthetically pleasing in the majority of the cases. Often there was the odd case that turned out bulky and the teeth looked “fat”– obviously the proportions were off. This started to give veneers a bad rap! So by the mid to late 1990s the pendulum had swung to more aggressive preparations, often into dentin. This achieved excellent aesthetic results due to the fact that ceramists had lots of room to create artistry into their ceramics. Also, at that time, Ivoclar introduced IPS Empress, a leucite glass-ceramic material with a flexural strength of approximately 160 MPa.2 This became one of the most marketed dental materials of all time. The “Empress Revolution” was on! Most practitioners started to switch from feldspathic porcelain veneers that typically had more conservative preparations, to pressed porcelain veneers. This often required heavy reductions to allow for the pressed ceramic that was often cut back and layered with a weaker layering ceramic. With time we saw that these restorations had their problems – debonding (adhesive issues) or chipping and even breaking (occlusal or structural issues). Often this was due to poor case selection and not respecting the physical properties of these ceramics or the limitations of adhesive dentistry.
A few years back Lumineers®(DenMat) were reintroduced back on the market with a very aggressive marketing plan and the no-prep veneer was back.3 Back in the late 1980s, Cerinate® veneers were heavily marketed as no-prep veneers. Lumineers® are basically a re-introduction of Cerinate® veneers. The pendulum has swung back again to conservatism with a heavy marketing campaign.
Ivoclar Vivadent then introduced modifications to their IPS Empress and then introduced the e.max system- a lithium disilicate material. This can be pressed or CAD/CAM, and can be used in a monolithic form where it has a flexural strength in the range of 360-400 MPa or cut back and layered. The layering ceramic has a flexural strength in the range of 90 MPa. Understanding these materials becomes paramount on their selection based on the diagnosis of your case.
After 30 years of practice and placing over a thousand veneers, I can say that the longevity of veneers is heavily determined by case selection. Case selection hinges upon, numerous factors, but mainly on: the existing occlusion, the structural integrity of the teeth involved, the biologic aspects of these teeth, the patient’s aesthetic expectations, and the operator’s ability and training.4,5,6,7
Whether you use a very conservative preparation design, such as a no-prep approach, or a more aggressive preparation design, the diagnosis of your case and your material selection for either approach will determine the success or failure.
One must critically analyze all the parameters of the case before deciding on whether it lends itself to take a more conservative or a more aggressive approach and then decide on the material choice.
The following case illustrates a more conservative preparation design to achieve a very nice aesthetic result for the patient.
Case Report
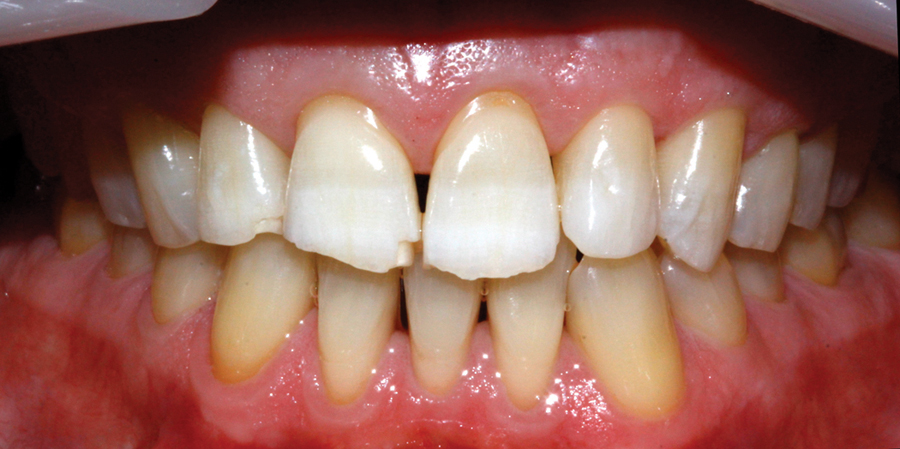
A 64-year-old male, in good health, presents for a recare exam. He is also under the care of a periodontist and is in very good periodontal health. Approximately 15 years earlier his wife had porcelain veneers placed that have served her well with no complications. Their son was getting married during the summer and with the encouragement of his wife he was interested in a smile improvement for the wedding. He presents with a good Class 1 occlusal scheme but has chipping in his anterior teeth, most notably on 12, 11 and 21 (Figs. 1-3). He was also interested in improving the overall colour of his teeth. An open discussion followed on the benefits, risks, and alternatives to porcelain veneers including the importance of wearing a night-time protective guard. The patient was interested in pursuing four porcelain restorations on teeth 12 to 22. He consented to take home tooth whitening for a period of a few weeks before deciding on a final shade in concert with making a trip to the dental lab for custom shade selection.
FIGURES 1- 3: Pre-op presentation of case showing chipped Maxillary anterior teeth.
FIGURE 1.

FIGURE 2.

FIGURE 3.
Records were taken: Photos, radiographs, alginate impressions for study models and whitening trays, and recording a diagnosis using the Dental Aesthetic Assessment form (DAA©). A diagnostic wax-up and putty index would be fabricated by the lab (Figs. 4-6).
FIGURES 4-6: Pre-op model, wax-up and sil-tech putty for provisionalization.
FIGURE 4.
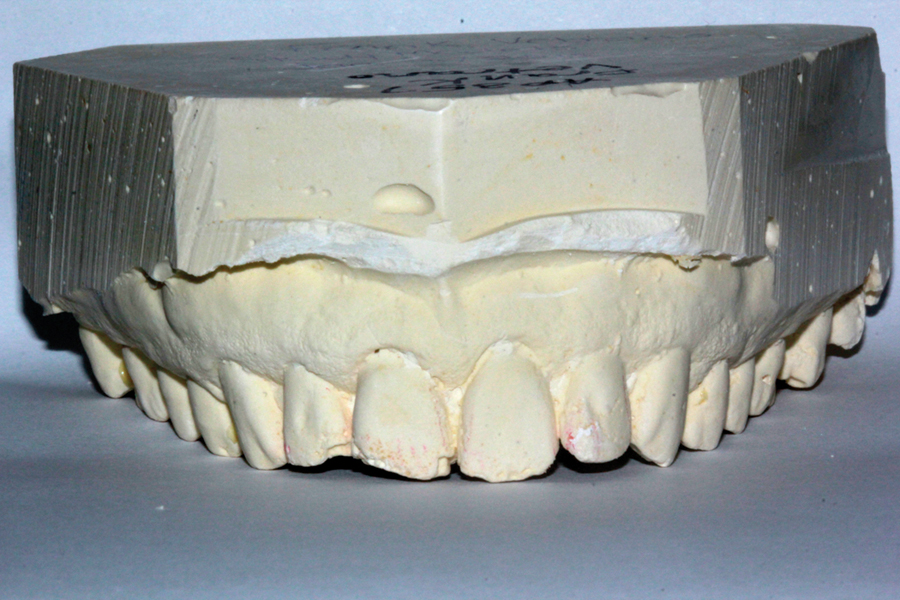
FIGURE 5.
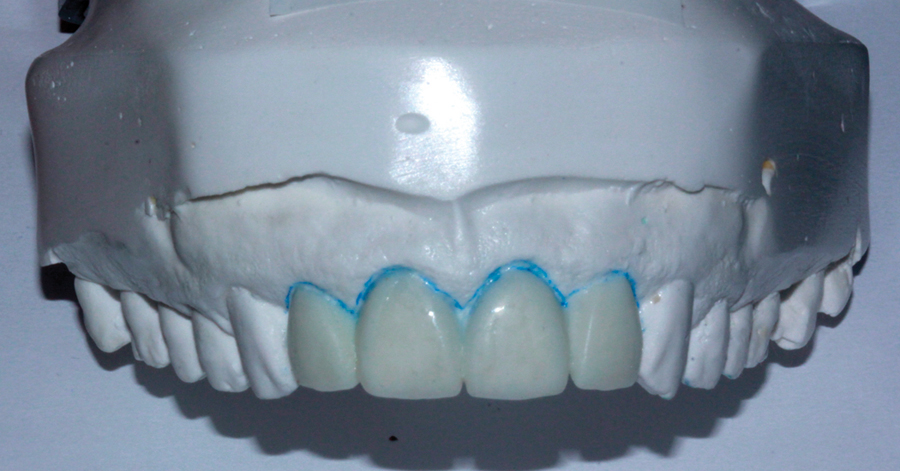
FIGURE 6.
The patient returned a few weeks later after he finished home whitening and allowing some time for some rebound. A nice result was achieved compared to his pre-whitening shade (Fig. 7). After local anaesthesia, teeth 12 to 22 were prepared conservatively for 4 IPS e.Max (Ivoclar Vivadent) monolithic veneers. The contacts were not broken during the preparations. Stumpf shade selections, along with photographs, were taken for the laboratory (Fig. 8). A full arch Aquasil (Dentsply), heavy and light body PVS impression was taken, along with a stick-bite. Using a putty index of the wax-up, the case was temporized with an A1 shade Luxatemp bis-acryl methacrylate (DMG America), using a shrink-wrap technique with spot etching of the four teeth. If the preparations were such that interproximal contacts were broken then spot etching is typically not necessary in the shrink-wrap technique. After trimming and polishing it was noted that there was show thru of the underlying tooth structure thru the thin mid labial of the 11 and 21 (Fig. 9). This was obviously under preparation of these areas. Photos were taken to send to the lab. A discussion followed with the patient as to how this was going to be handled – either through reduction copings or reduction stent provided by the lab or through the lab bulking the restorations labially and using a more opaceous ingot. The patient was advised as to both possibilities.
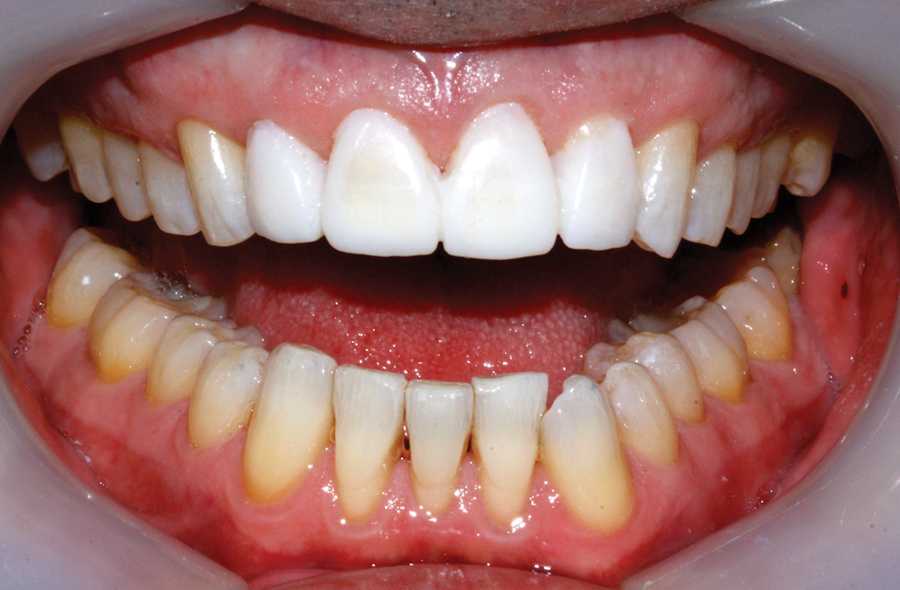
FIGURE 7. Post-op whitening photo with the initial shade tab to see nice improvement.
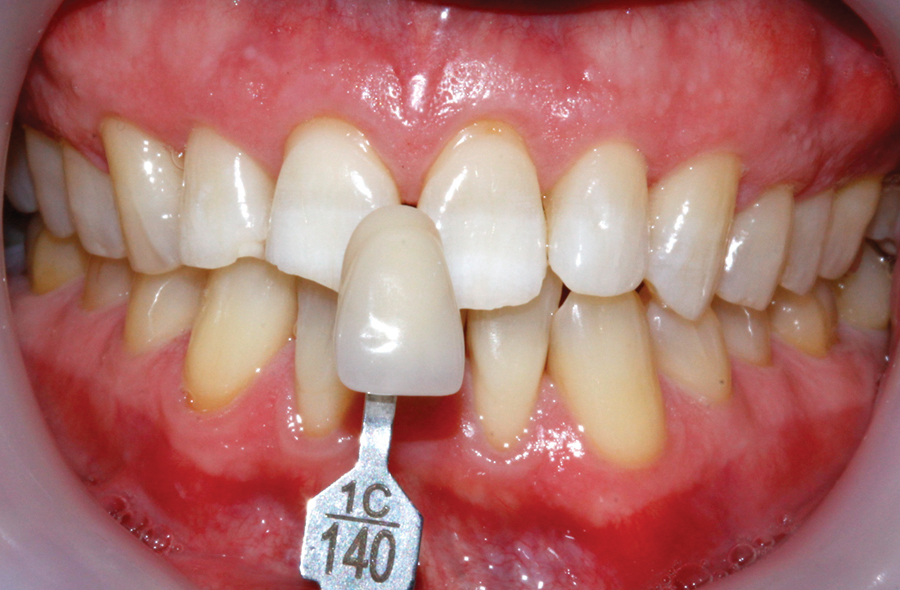
FIGURE 8. Stumpf shade of underlying tooth colour.

FIGURE 9. Photo of provisionals showing under prepared 11 and 21 – show through is evident
The patient returned a week later to check that he was pleased with the shape, contours, sizes and lengths of his provisionals. All was confirmed as acceptable. An alginate of these was taken for records purposes and to compare to the final restorations.
The case was returned from the laboratory and inspected to make sure the Prescription had been adhered to. The lengths were measured and compared to the model taken of the provisionals. The veneers were silanated and put away until the insert appointment in a few days.
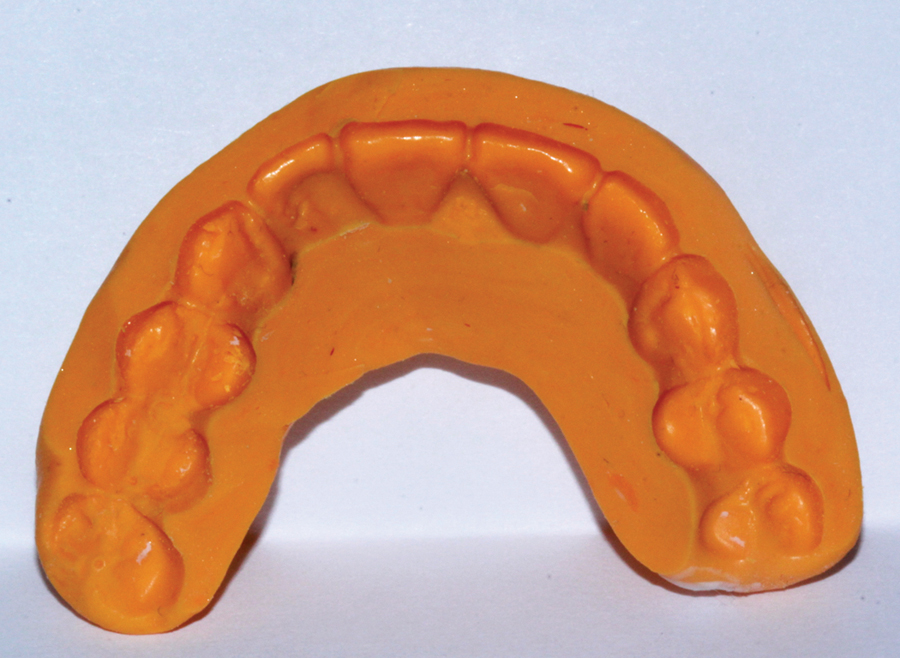
At the insertion appointment, the patient was made aware that some further reduction of the 11 and 21 would be done using the reduction stent provided by the dental lab. Local anaesthesia was administered, the provisionals were sectioned off, the spot etch areas were cleaned and all adhesive remnants were removed. The reduction stent was placed over the teeth and the areas to be reduced were marked and then reduced (Figs. 10-13). The veneers were tried in and the fit was verified one at a time and then all four together. The veneers had Single Bond (3M-ESPE) adhesive applied, thinned out with a dry applicator, and loaded with the transluscent shade of Variolink II (Ivoclar Vivadent) base only. The lid of the light protective box was then closed while we prepared the teeth for cementation. The teeth were cleaned with chlorhexidine and pumice, and then acid etched with 37 percent phosphoric acid, which was thoroughly washed off after 20 to 30 seconds. The overhead light was turned off and the light from my loupes was also turned off before applying Single Bond (3M-ESPE) adhesive to the teeth. Note that this is NOT light cured at this point. My assistant holds the light protective box with the veneers over the patient and close to the chin. Each veneer is placed over the teeth starting with the 11 and 21, followed by the 12 and 22. The veneers are placed with approximately 90 percent pressure in other words not seated all the way down with full force. A rubber tip was used to remove excess cement in an apical direction both labially and palatally. Floss is used interproximally to remove excess cement without forcing the floss thru. A tacking light with a 2 mm light aperture was used by my assistant to tack the veneers one at a time, mid labially for seven seconds each, while I fully seated the veneers apically and palatally to 100 percent full pressure. DeOx (glycerin)(Clinical Research Dental) is applied to all the margins and full curing ensues – approximately one minute per veneer, depending on the light one uses.
FIGURES 10-13: Models of preps, further reduction required-marked in red by laboratory, reduction skin (template) to be used intra-orally to further reduce the under prepared areas.
FIGURE 10.
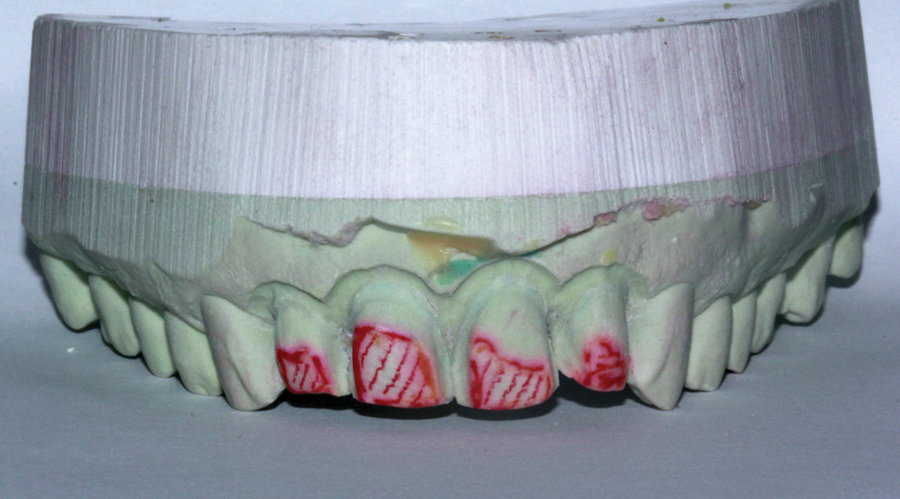
FIGURE 11.

FIGURE 12.
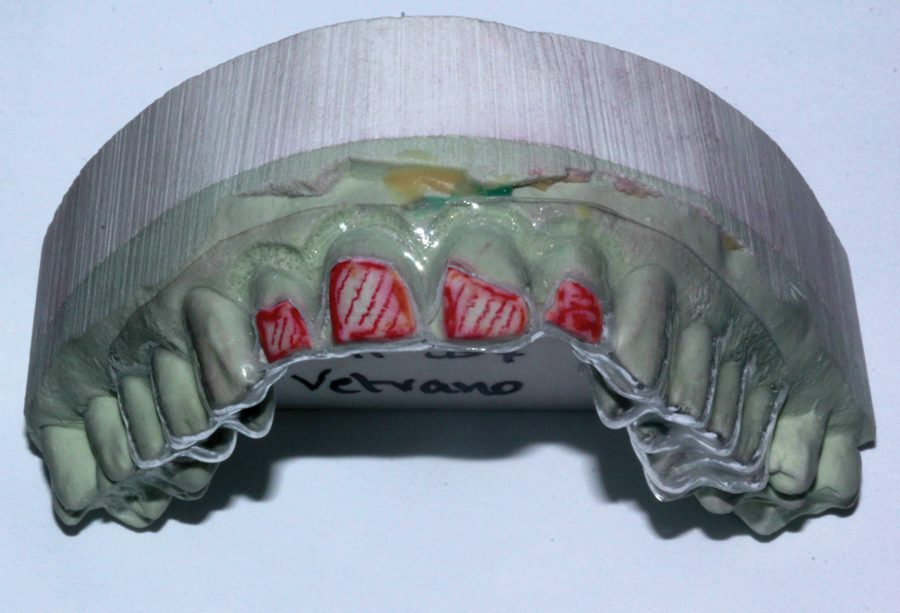
FIGURE 13.

A one sided #12-scalpel blade is used to cleave off excess cement around the teeth. If flossing is too difficult then a contact breaker is used to separate the veneers so that they can be easily flossed. Making sure that all excess cement is fully removed is important to the health of the tissues. The occlusion is checked, including protrusive and crossover. If any adjustments are necessary, use a fine football shaped diamond under copious water, followed by the dialite (Brasseler) series of porcelain polishing tips. Proxyt (Ivoclar Vivadent) porcelain polishing paste with a rubber cup finalizes the polishing procedure around all the veneers. A few photos are taken; post-operative instructions are given orally and in written form. An alginate impression is taken of the final case from which an Essix (Dentsply) retainer is made. The patient is told ahead of time that this is his insurance policy to be worn nightly in order to protect his veneers.
The patient is re-appointed in a week for a post-op appointment to ensure that he is pleased with his result and has no sensitivity, flossing or occlusal issues. Final photos are taken at this appointment, as the gingiva will have healed from any trauma from the clean up of the excess cement. Care of the veneers and wearing of the Essix (Dentsply) are re-confirmed before dismissal.
The patient was very pleased with the final aesthetic result achieved using conservative IPS e.Max monolithic pressed veneers (Ivoclar Vivadent) (Figs. 14-21). OH
FIGURES 14-21: Final photos – patient very pleased with final result.
FIGURE 14.
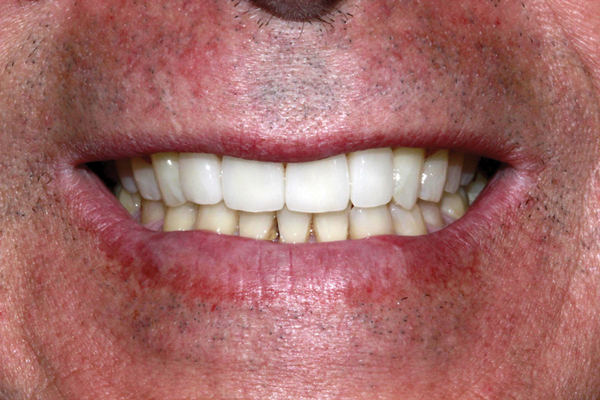
FIGURE 15.

FIGURE 16.
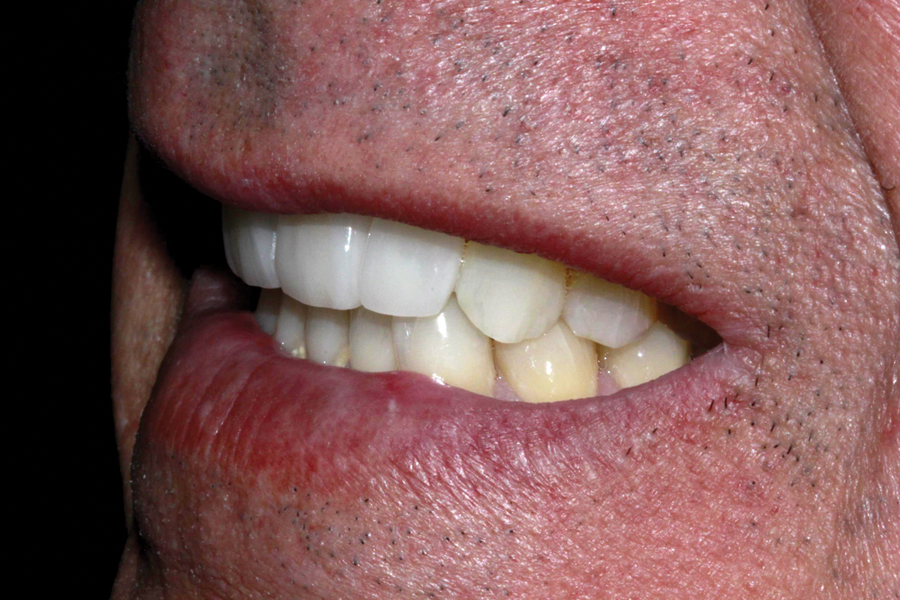
FIGURE 17.
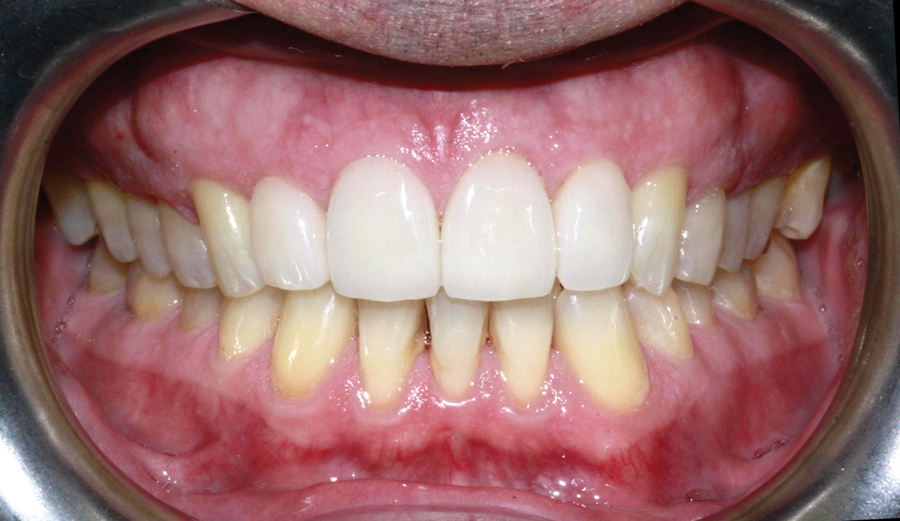
FIGURE 18.
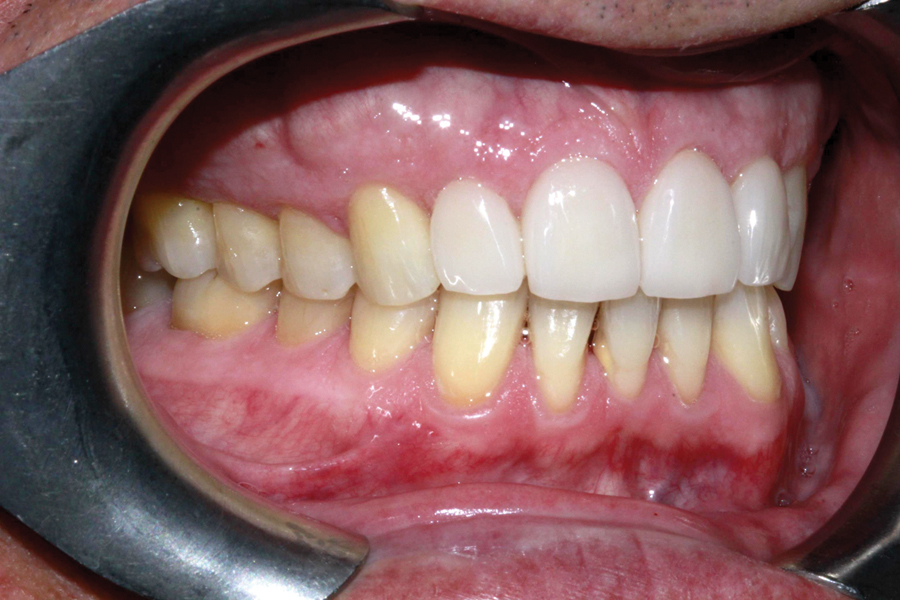
FIGURE 19.
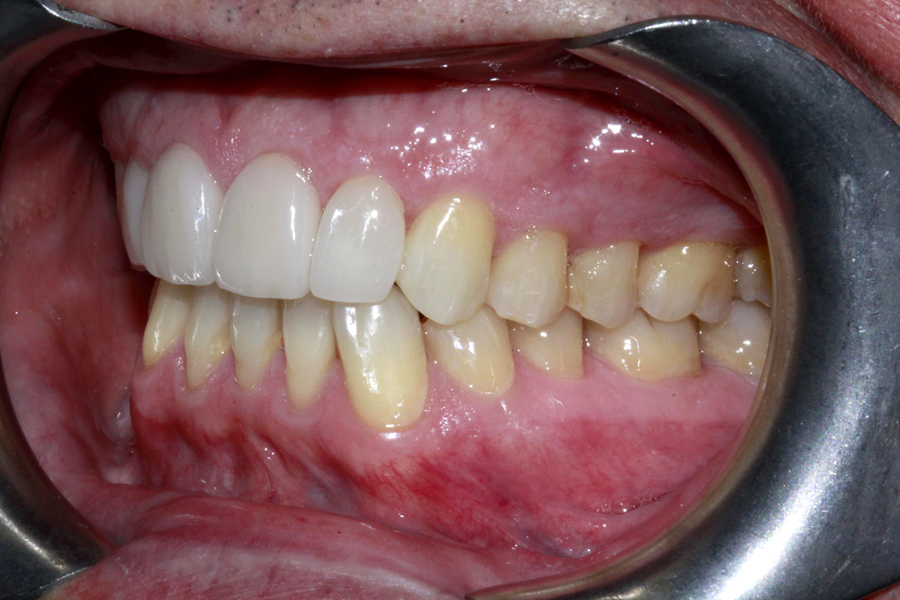
FIGURE 20.
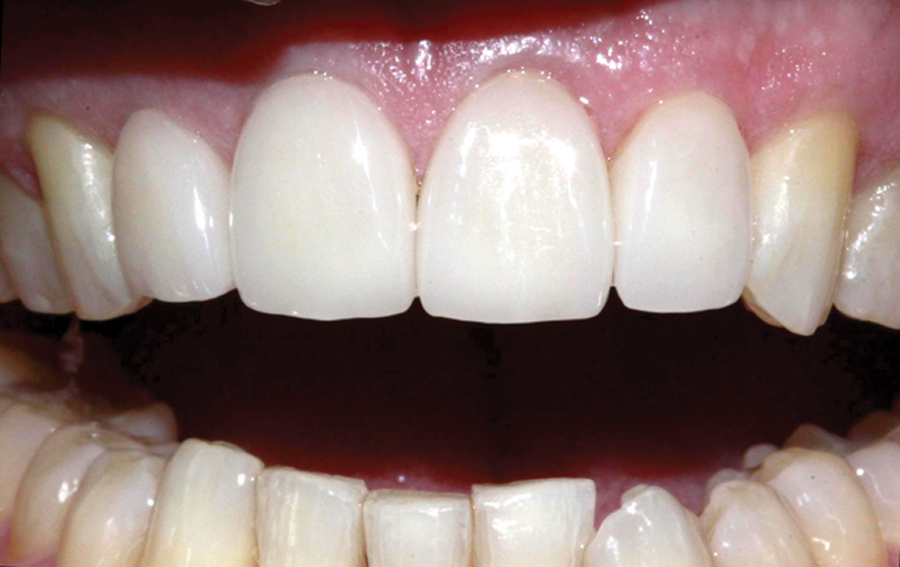
FIGURE 21.

Acknowledgement: The author would like to thank Rotsaert Dental Laboratory for the fabrication of these restorations.
Dr. Mancuso Graduated from the University of Toronto in 1985 and has maintained a general dental practice in Welland for the last 30 years. He has published articles for various dental journals and has lectured to various organizations across Canada, the U.S. and internationally. He has been involved in the AGD at all levels and currently is President of the Regional Niagara AGD study club. He may be contacted at tmancuso@cogeco.ca.
Oral Health welcomes this original article.
References:
1. Malcmacher L. No-Preparation porcelain veneers-back to the future! Dent Today. 2005;24(3):86,88,90-91
2. Fradeani M. Six-year follow-up with Empress veneers. Int J Periodontics Restorative Dent. 1998:18(3):216-225
3. Wells DJ. “No-prep” veneers. Inside Dent. 2010;6(8): 56-60
4. Edelhoff D, Sorenson JA. Tooth structure removal associated with various preparation designs for anterior teeth. J Prosthet Dent. 2002:87(5):503-509
5. Anusavice K. Standardizing Failure, Success, and Survival Decisions in Clinical Studies of Ceramic and Metal-Ceramic Fixed Dental ProsthesesDental Mater. 2012 Jan; 28(1): 102-111
6. Alhekeir D. et al, Porcelain laminate veneers: Clinical survey for evaluation of failure, Saudi Dent J. 2014 April; 26(2); 63-67
7. Shety A. et al, Survival rates of porcelain laminate restorations based on different incisal preparation designs: An analysis, J.Conserv Dent. 2011 Jan-Mar; 14(1); 10-15


