
As soon as I figure out how to use my iPhone, Apple releases the next generation. With the new one, I found out I couldn’t plug my old headphones into my new device without some wild adapter. Who decided to take the hole away without asking me? The world of technology has changed so fast that it’s hard to keep up. Dental photography continues to change as well.
I hate that feeling of spending $1000 on some gadget that becomes obsolete in a few months, and that feeling is similar to the one I get seeing my post op X-ray that shows what I thought was a perfect endo – only to be short by 5 mm. I watch the pile of unused, out of date gadgets grow in my practice basement.
So, where are we with dental photography in 2018? Has the iPhone replaced dental macro camera set-ups yet? Well, not exactly. However, technology has made everyday photography much simpler for most practices to implement. We will review the best two systems for capturing excellent, practice building images.
Beyond Megapixels
It’s easy to get caught up in the marketing megapixel macho race……DON’T! We want the best, not the biggest. If bigger is your goal, Hasselblad (Hasselblad, Gothenburg Sweden) makes a true 50-megapixel camera with the most advanced colour delivery system ever made for a mere $45,000. It’s your chance to have the best.
For dentistry, there are factors that may be more important than pixel count. We are looking instead for a system where the camera, lens, and flash work together to provide images that are in focus with correct lightness and accurate colour. Even so, when we find the system with these attributes, if the doctor and staff can’t or don’t want to use it, it will end up in the scrap heap of dental gadgets we never use but had to have.
The goals of implementing an effective digital photography system for a dental practice are the following:
- Buy an ergonomic system the staff can and will want to use
- Look for accurate colour and light control
- Make sure its versatile enough for portraits as well as quadrant close-ups
- Take time to make sure the staff is well trained
- Choose a series of images that are consistently taken
- Practice
The SLR System
The workhorse for quality dental digital photography has been the combination of a camera body, macro lens, and “ring” flash (Fig. 1). These single lens reflex SLR systems set the standard for terrific images. The learning curve is a bit much for some but with proper training, practice and camera knowledge, excellent and accurate images can be routinely captured. Nikon and Canon have dominated this category for many years with the 100-105 mm macro lens and some type of macro flash.
To combat the weight and cumbersomeness of these systems, the last few years have featured the 85 mm lens and wireless flash (Fig. 2). While certainly lighter and easier to use, the buttons and settings can be daunting for many, particularly the staff (Fig. 3). Any time one of the settings is changed, the images may be less than ideal and frustration can ensue for the staff. But when this machine is fine-tuned, the resulting photography is the standard by which any other system should be compared.
Fig. 1
SLR camera body, macro lens, and macro flash systems from Nikon and Canon.
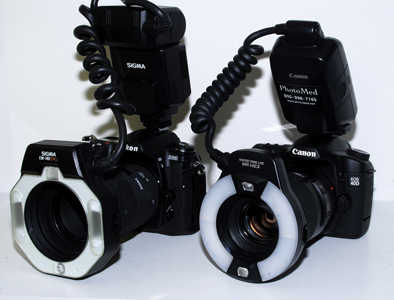
Fig. 2
Newer SLR systems deal with the weight and ergonomic issues by using a shorter, 85 mm lens and wireless flash.
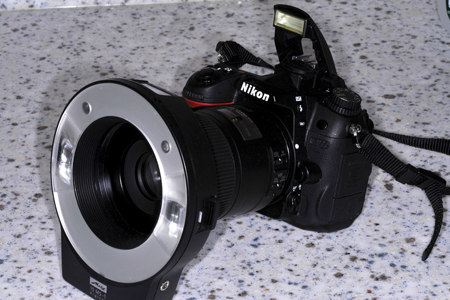
Fig. 3
The mariad of button and dials can be intimidating and confusing.
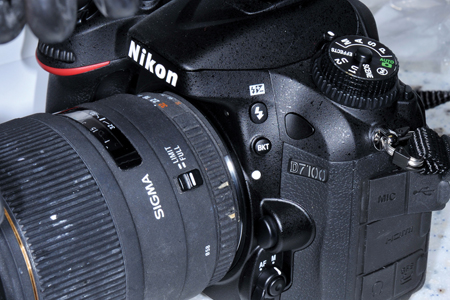
Fig. 4
SLR cameras are most often taken by looking through the view finder at the subject.
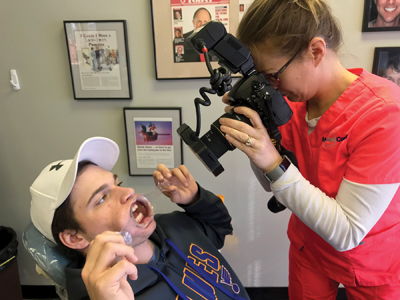
Proper positioning can certainly be an issue with these cameras because of their weight, length of lens, and the fact that you normally must hold the camera viewfinder up to your eye when capturing the image (Fig. 4). Looking through a small hole is strange for those entrenched in this smart phone camera generation, where we hold the camera out in front of us and look at a large touch screen. These factors combined have the potential to cause the doctor and staff to stay away from routine use and therefore, the integration of photography into the modern practice.
However, these three component systems still should be considered for those teaching, going for accreditation in one of the disciplines, those aspiring to be published, or those who will make very large prints for an office gallery. When the “white balance” is properly set for correct colour, a quality SLR sensor can give very accurate colour, which is important for life-like images that are particularly useful for lab communication. When the aperture, shutter speed, and flash are set for proper lighting of the image, neither over or under exposed, the images are unsurpassed.
Settings vary greatly and tweaking or customization is maximized with the SLR type cameras. Generally, we shoot in “A” mode (aperture priority) or in “M” mode (manual) depending upon the brand and model of the camera. “A” mode allows for only changes in the aperture (f/stop) while shutter speed self-adjusts. “M” allows manual setting of the aperture and the shutter speed while. Simply put the aperture controls the size of the hole light goes onto the sensor while shutter speed controls the length of time the hole stays open. Again, a basic understanding of these photography parameters is important for consistent, quality images with these set-ups.
Shofu EyeSpecial III
To make things simpler, lighter, and more likely to be used there have been many attempts at “point and shoot” type systems with varying degrees of success. None the quality of cameras discussed above. The EyeSpecial C-III is the third-generation dental specific camera from Shofu that is almost as simple as the iPhone camera with nearly the quality of the SLR-macro set (Fig. 5). This camera has a built-in lens and flash and comes in about one-fourth of the weight.
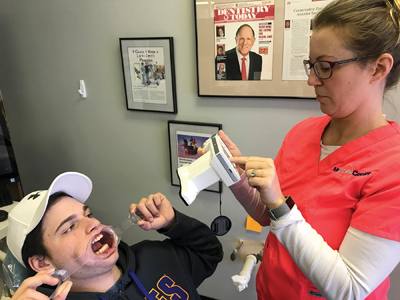
The camera itself has a very durable, water resistant covering designed specifically with the dental team in mind. Even disinfection is simple because of its clean surface with few buttons to get confused about (Fig. 6). Even more important for the younger staff is that the camera has a very large, easy to use touch screen that is held in front of the user as a smart phone would be making the system quickly feeling comfortable (Fig. 7).
Fig. 5
The Shofu EyeSpecial C-III has a built-in flash and lens.
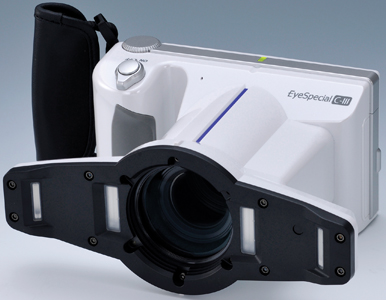
Fig. 6
Being designed exclusively for dental use, the camera is very user friendly, even for wiping and disinfecting.

Fig. 7
A large advantage of the EyeSpecial is the ability to hold the camera with one hand while using a touch screen to control, much like a smart phone.
There are eight different preset modes including with “Standard” and “Portrait” being used the most. There are also specific modes for shade matching, surgery, and bleaching at the touch of the screen. The flash, colour, and shooting modes are in the camera and with the large touch and viewing screen, the staff will have no problem using this camera for everyday office photography. There is a built-in “modeling” light that lights up the subject to help with the touch screen spot focusing. Very well thought out system.
The camera comes out of the box set up and ready to use. The images taken compare the Nikon d80, Nikor 85 mm lens, and the Metz wireless macro flash with the EyeSpecial C-III right out of the box. The quality is remarkably similar with slight differences in color. In portrait mode, the images are crisp with good even lighting perhaps without the depth given from the macro flash of the SLR image on the left (Fig. 8).
Intraoral photography has a slightly redder image on the left Nikon image, and slightly more yellow with the Shofu camera on the right (Fig. 9). Both have a very good depth of focus. The SLR camera was set to a 5100-degree Kelvin custom white balance, shot in “A” mode at f/25 aperture, while the Shofu camera was at factory settings in “Standard” mode. Close up shade tabs were similar as well (Fig. 10).
Fig. 8
In a side-by-side comparison with Nikon on the left and EyeSpecial on right, colour is similar on both with good even lighting.
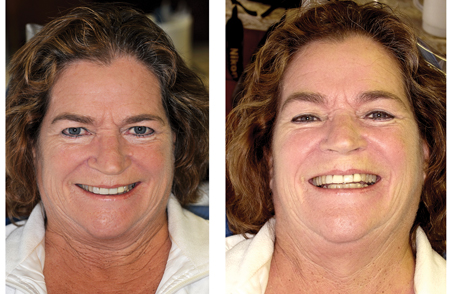
Fig. 9
With a retracted view, the Nikon on the left has a slightly pinker soft tissue, with the Shofu camera on the right having slightly more yellow teeth.

Fig. 10
With close up photography of the shade guide, SLR on top with EyeSpecial on bottom, the colours are very similar with good separation between the shade tabs.

The image quality is very similar with slight variations and both cameras are excellent for daily dental photography usage. For the busy, efficient practice it would seem at this point that the more user friendly EyeSpecial C-III may be a more practical choice with regards to simplicity and nearly equivalent image quality.
Accessorizing
Like a well-dressed person, accessorizing can make all of the difference (Fig. 11). Retractors are needed for soft tissue retraction and education of shadows, and a mirror is also used for quality side and occlusal shots. The black contractor is an optional black background primarily used when communication incisal character or shades are sent to a lab. A mug heated in a microwave with water until body temperature warm is used to make the mirror warm, which reduces fogging and keeps the retractors in to make them more comfortable when sliding in the patient’s mouth.
Another very useful item is a background for portraits. You could certainly set up a portrait studio but the operatory works just fine with the proper background. A poster board or bulletin board slipped in behind the patient works well for a solid background and reduction in glare (Fig. 13).
Fig. 11
The right accessories including mirror, retractors, and dark contrastor are important.

Fig. 12
It is very important for efficiency that the staff have everything ready and easily accessible for photography.

Fig. 13
For portrait background, a felt or cardboard poster board works very well to get rid of background distractions and glare.


What images to take
Organization, practice, and proper equipment are the keys becoming efficient with quality photography. What images should your staff take? You must decide what you are doing with the images and be consistent with the distances, angles, and settings. Come up with a group of images for various procedures and print them so the staff can copy them.
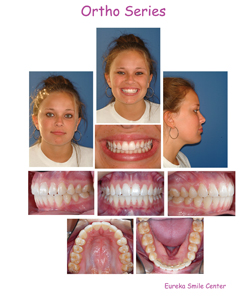
One example is the American Academy of Cosmetic Dentistry series (Fig. 14). It’s not so important that you follow these exact images, unless trying to become accredited, but that you decide what fits your practice best. Other series, like a typical orthodontic series, include occlusion for better lab communication and case documentation with a full head photo for good marketing (Fig. 15).
Fig. 14
A popular series for cosmetic advancement is that of the AACD.

Fig. 15
Orthodontic series has the advantage of occlusion images and a full head portrait.
For consultation, a simple series of images, placed on a computer and shown to the patient can be very effective in showing smile imperfections that you may be able to correct (Fig. 16). Showing patients what you suggest is much more powerful than merely telling them. For comprehensive cases, a more complete series for case documentation, lab communication, and marketing, should be standard for medico-legal reasons (Fig. 17).
One of the most important reasons for quality photography is for the dentist to become better clinically. Nothing shows our imperfections more than close-up images. After work, particularly anterior restorations, take mid-treatment images and use them for case modifications. For instance, images may be taken in a direct composite veneer case during treatment, then evaluated, and enhancements can be made (Fig. 18). In this case, the doctor took images and made corrections to composites using the images as a blueprint.
Fig. 16
Any time a patient comes in with an anterior/aesthetic concern, someone on the staff should start with a few images and review with the patient on a large monitor.
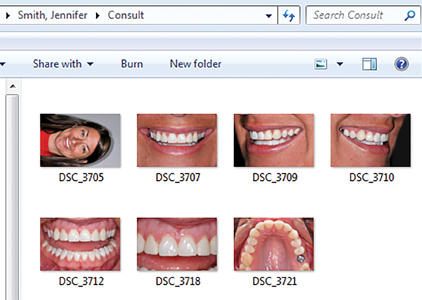
Fig. 17
Case documentation involves more images with consistent angles.

Fig. 18
Self-critique during treatment can be an invaluable tool to help make mid-treatment corrections resulting in a better outcome.

For lab communication, retractors are placed and the shade tabs are held on the same plane as the moist teeth for proper lighting (Fig. 19). The optional contrastor helps provide more natural lighting, character, and detail of the tooth. In regards to indirect restorations, translucency equates to vitality while opacity looks fake. In order for the ceramist to know what opacity material to use, preparations shades are always taken for anterior restorations and emailed to the lab (Fig. 20).
Fig. 19
Lab communication should center around excellent images that the ceramist can use to improve the result.
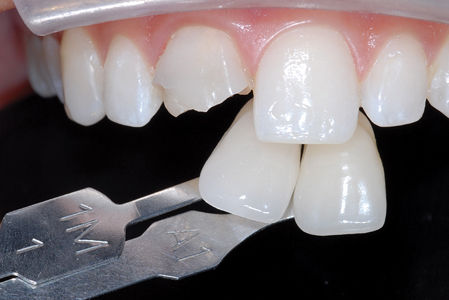
Fig. 20
The more quality information given to the lab, the better the result particularly when it comes to anterior restoration opacity.

Summary 2018
The decision to incorporate quality photography into everyday practice is an easy one. What equipment to buy takes a bit more effort but it comes down to the goal of the dentist and what will be done with the images. For basic case documentation, marketing, and lab communication, a simplified system that the staff is most likely to use long-term makes sense. The Shofu EyeSpecial C-III fits this need. For those desiring more customization, slightly better detail and color, and for educational reasons, a more complex digital SLR system makes sense.
Great photography only comes from dedication of the staff to become better and to realize the need to incorporate excellent images for the overall good of the practice and patient. Fit the proper equipment to meet your practice goals, accessorize correctly, and be consistent with the images taken. Then your practice will realize great benefits. OH
Oral Health welcomes this original article.
About the Author
 Dr. Griffin is a full-time practitioner and has owned multiple practices in the St Louis area for 30 years. He has been awarded Diplomate status with the American Board of Aesthetic Dentistry, Accreditation in the American Academy of Cosmetic Dentistry and considers it a sincere honor to be able to teach other dentists comprehensive aesthetics, regenerative dentistry, clinical photography, practice management, and other relative topics. He has had over 50 clinical articles published, is a clinical director for the Pacific Aesthetic Continuum, and has review products for Reality Esthetics, Dental Advisor, Dental Product Shopper, and many other publications.
RELATED ARTICLE: Dental Photography: A New Perspective; Part II, Techniques
Follow the Oral Health Group on Facebook, Instagram, Twitter and LinkedIn for the latest updates on news, clinical articles, practice management and more!


