
Aesthetic dentistry is not just about beautiful restorations. Careful diagnosis and interdisciplinary planning are required for predictable treatment outcomes that will satisfy the patient and stand the test of time. Prior to restorative treatment, the temporomandibular joints, face and smile need to be assessed. Once the stability of the joints is determined, an evaluation of the face and smile would determine the position of the final restorations. The following aesthetic case illustrates the treatment workflow and the various considerations involving orthodontics and periodontics.
The patient presented to the Facial Pain Unit at Mt. Sinai Hospital with a previous history of temporomandibular disorder symptoms that included a limited range of mandibular movement and myofascial pain. Treatment involved counselling with regard to parafunctional triggers in addition to directed therapy to address the functioning of the muscles of mastication after steroid trigger injections in association with the coronoid attachments of the temporalis muscles were undertaken to address the acute discomfort and limited opening. The patient’s chief complaint was crowding and the size, shape and colour of her teeth. The final restorations planned were porcelain veneers from #14 to #24 inclusive, to improve size, shape and colour. The existing teeth were short due to wear. Lost height can generally be increased either incisally or apically. An evaluation of the face and smile revealed that the existing incisal edge position was close to ideal. Moreover, the patient was a singer and thus special consideration was made to not change her incisal edge position significantly due to concerns with creating alterations in phonetics. A smile analysis also revealed that there was vertical maxillary excess, with gingival show upon smiling of 5 mm. A decision was made to increase tooth height via clinical crown-lengthening. The main advantage of including orthodontics is the reduced amounts of tooth preparation, eliminating the need to restore lingual surfaces to control the occlusion, and better tooth proportions.
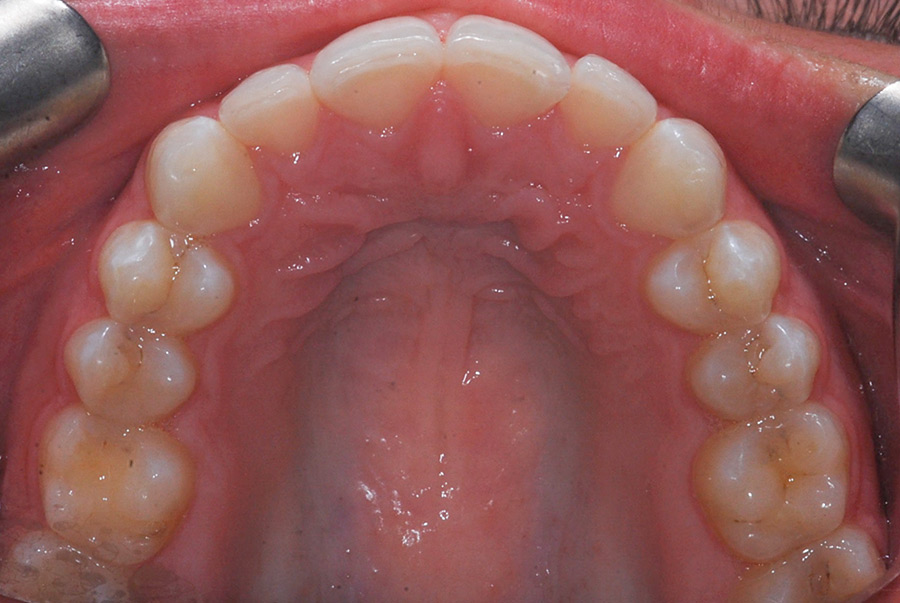
The patient was diagnosed as a Class 1 malocclusion with Class 3 tendency, retroclined lower incisors, mild upper crowding, and mild to moderate lower crowding (Figs. 1-5). She had previously attempted Invisalign treatment but the result was not successful due to lack of changes in bite depth and consideration for future restorations. The desire to improve her smile was motivated by her career as she is frequently photographed and featured on social media. As she is a singer and always performing, Invisalign was the treatment of choice to improve her esthetics and occlusion and provide better archform and balance to her smile. Consideration was also given to the slight Class 3 tendency and our goal to avoid proclination of the lower incisors, which is difficult to control with traditional fixed orthodontics. Treatment was duration of 11 months and included 40 aligners for each arch and limited attachments, with no refinements and only five appointments. The number of aligners was increased and the velocity of movement adjusted to accommodate a flexible schedule of wear.
Fig. 1

Fig. 2

Fig. 3
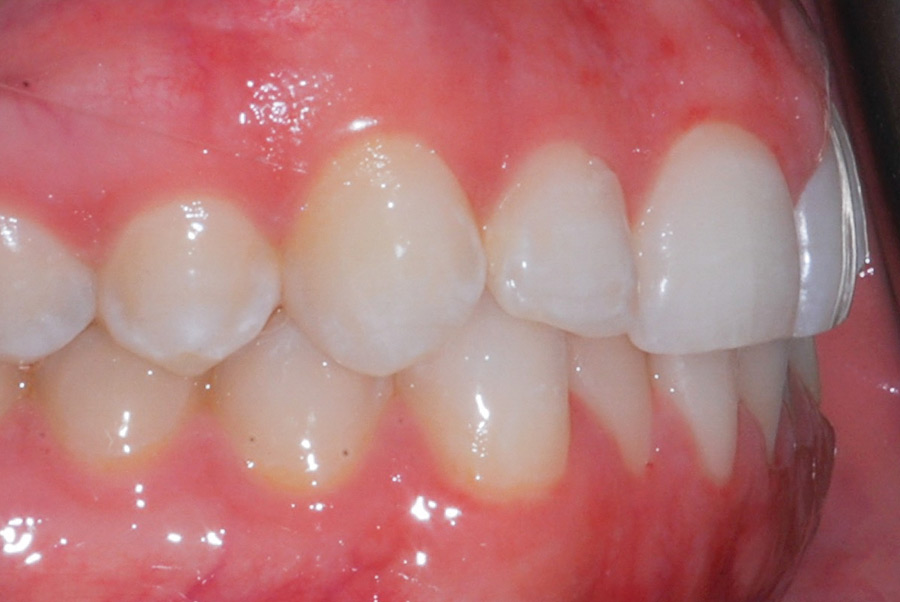
Fig. 4
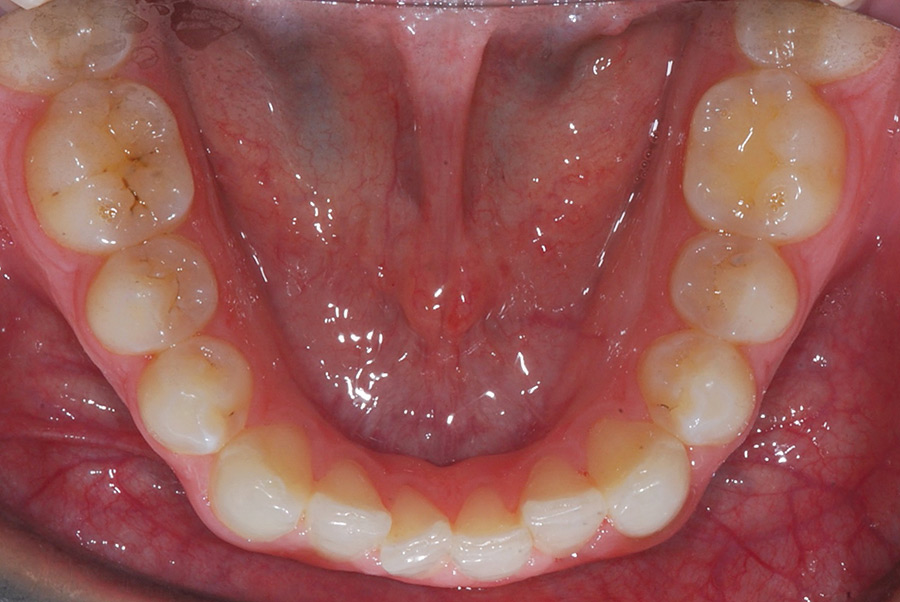
Fig. 5
After orthodontic treatment had concluded, the patient was ready for the perio-prosthetic phase of treatment (Fig. 6). A smile photo and a full-face smile portrait were taken. Combined with a 3D printed model from an Iteroâ scan of the patient’s post-orthodontic dentition, the shape and sizes of #14-24 were planned digitally using Exocadâ. A wax model of the planned shapes from tooth #14-24 was milled out and a trimmed putty matrix was fabricated. A trimmed putty matrix was used for the intraoral mock up using B1 Luxatempä. This allowed the patient to visualize the proposed plan before any soft tissue procedures or tooth preparations. Once the mock-up was approved by the patient, the putty matrix used was then the surgical guide to determine the amount of gingival recontouring and bone removal (ostectomy) that would be required. The patient underwent the crown lengthening procedure under IV conscious sedation and local anesthesia. Using the template provided, an initial inverse bevel incision was performed to achieve the ideal contour of the gingiva from teeth 15 to 25, taking into consideration the appropriate gingival zenith for the central and lateral incisors. The papillae were raised in a split thickness design followed by full-thickness mucoperiosteal elevation apically. Osseous resection/recontouring was then preformed on the buccal surfaces of teeth 15-25 using a round diamond bur on a high speed surgical (Impact Air) handpiece to allow approximately 3 mm of supracrestal tissue attachment (previously known as biologic width) from the osseous crest to the planned restorative margins. Thorough irrigation with sterile saline was completed and the flap was repositioned and sutured with 6.0 Polypropylene sutures in an interrupted fashion in the areas of the papilla (Fig. 7). Pressure was applied with damp gauze and hemostasis was achieved. The patient was prescribed a rinse containing Chlorhexidine 0.12% to use twice a day for two weeks until the sutures were removed. Minimal post-operative discomfort was expected and the patient was instructed to use OTC Advil every four to six hours as needed for pain.
Fig. 6

Fig. 7

After 10 weeks of soft tissue healing and maturation, the teeth were ready to be prepared for feldspathic veneers (Fig. 8). The same wax up for the mock-up was slightly modified and two putty matrices were fabricated. One matrix was sectioned and used as a reduction guide and the other for the fabrication of the provisionals.
Fig. 8

Since the natural teeth had a satisfactory colour the planned final shade change was not significant and tooth reduction was therefore more conservative with only 0.5 mm reduced from the facial and 0.75mm from the incisal edges as the incisal length was not changed. The preparation extended interproximally but contact was not broken except between #13-21 where caries was found. All sharp angles were rounded and preparation margins were equigingival. Glumaâ desensitizer was applied on all prepared teeth. A prep shade photo was taken with the A1 and A2 shade tabs at the same plane as the preparations in order to select the chroma, hue and value. Gingival retraction was accomplished with 3M™ ESPE™ Astringent Retraction paste. The final impression was taken with light and heavy body Imprint™ 4 VPS impression material. Each tooth was spot etched and spot bonded with Optibond™ Solo Plus. Provisional veneers were fabricated using B1 Luxatemp™ and the putty matrix using the shrink-wrap technique (Fig. 9). Excess material was trimmed intraorally with a fine diamond needle bur and the provisionals were contoured using Super-Snapâ buff disks by Shofu. The patient returned several days later and minor adjustments were made. Photographs of the patient’s face and smile and impressions of the provisionals were taken to facilitate communication with the laboratory. The final impression was poured in GC Fujirock® and the refractory cast was poured in G-Cera® Vest. Creation CC Porcelain was used in the fabrication of the veneers (Fig. 10).
Fig. 9
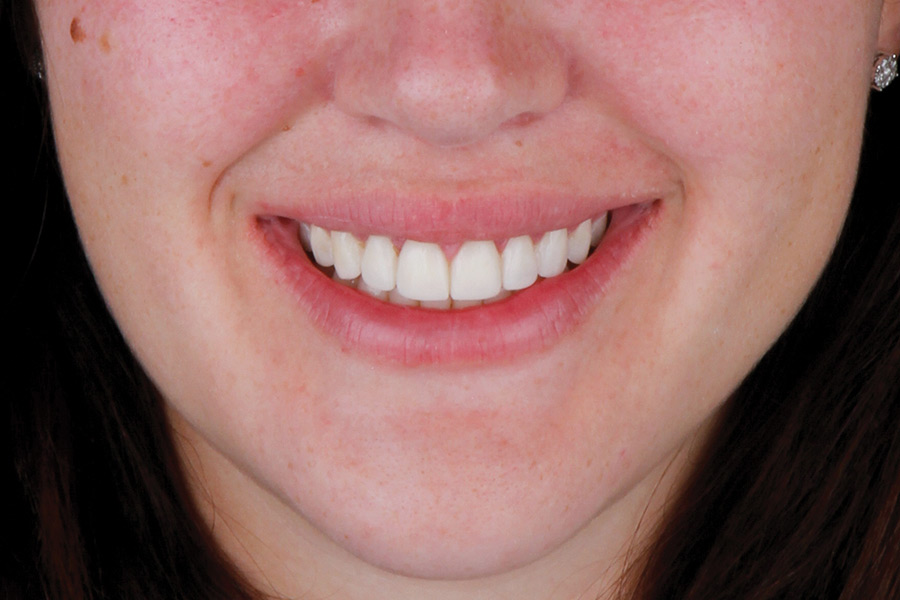
Fig. 10

At the delivery appointment, the veneers were tried in intraorally with water as well as various shades of try-in paste by Ivoclar Vivadent. After approval by the patient, the restorations were cleaned with Ivoclean and treated with Monobond Plus. The ceramic was already previously etched with hydrofluoric acid at the laboratory. Pumice was used to clean the tooth surface and the enamel was etched with 34% phosphoric acid etch. After rinsing and blotted dry, Adhese® Universal adhesive by Ivoclar Vivadent was applied, air thinned, and cured. Veneers were then cemented using light shade Variolink® Esthetic LC resin cement. A tacking tip was used to secure the veneer in place before the removal of excess resin. The final cure was done after all excess cement was removed. Margins, contacts and occlusion were checked. Centric contacts and eccentric movements were also verified as was canine guidance and appropriate contacts in protrusive excursions (Fig. 11). After final delivery of the final restorations, the patient returned to the orthodontist for an interim Essix retainer while awaiting the final Vivera retainers (from Invisalignâ) to help maintain the result and act as protection from parafunction. Frequent recalls and maintenance for this patient are crucial to prevent the occurrence of caries, periodontal disease, and prosthetic complications (Fig. 12).
Fig. 11

Fig. 12

Oral Health welcomes this original article.
The authors declare no financial interest in the companies mentioned.
Acknowledgement: We would like to thank the patient for trusting us for his treatment and Yuzo Matsumura, RDT, from Elephant Dental Studio.
About the Authors
 Dr. Caro received a Master of Orthodontics from the University of Toronto and complete an advanced, two-year Craniofacial Fellowship at the Craniofacial Treatment and Research Centre at The Hospital For Sick Children. Dr. Caro is a Staff Orthodontist at The Hospital For Sick Children, where she provides care for children with cleft lip and palate.
 Dr. Freeman co-heads the Facial Pain Unit at Mount Sinai Hospital in Toronto and lectures internationally on the topics of Patient Experience, Clinical Orthodontics, Facial Pain, and Virtual Surgical Planning. He maintains a private practise in Toronto with an emphasis on surgical and pre-prosthetic orthodontics.
 Dr. Johnstone is a board-certified Specialist in Periodontics. She maintains a private practice in Toronto and is a staff clinician at Mount Sinai Hospital in the Centre for Advanced Dental Research.
 Dr. Lands is a part-time instructor with the Faculty of Dentistry at the University of Toronto and in private practice in midtown Toronto.
 Dr. Siu is board certified in Prosthodontics in Canada and the US. He maintains a private practice limited to prosthodontics in Toronto with an emphasize in aesthetic.


