
The 21st century has proven to be a very interesting time for dentistry. Gone are the days when patients would only pay a visit to their dentist when in considerable pain or if a tooth had fractured. The trend has changed. Patients are seeking elective dental work and shopping around for providers to achieve the ultimate in cosmetic dentistry. This should come as no surprise, as the younger generation has never been more on display due to the arrival of social media. With a smartphone within arms reach equipped with cameras and filtering apps, faces have become front and center, littering our social feeds and timelines. More and more, patients’ primary concerns are becoming increasingly esthetic in nature, but at what cost?
For decades, as the quality of ceramics has evolved, we have typically proposed porcelain veneers as the definitive option for a whiter more balanced smile. For the majority of our younger millennial and Gen Z patients however, the financial and biological investment of veneers is extremely daunting. These patients often have had very little dental work, or simple preventive treatments over the course of their lives including braces, wisdom teeth removal, sealants, and regular cleanings with fluoride treatment. When outlining the procedure for veneers, the idea of needles, drilling away tooth structure, and multiple visits, my patients typically run for the hills. Maybe it’s my word choice, or the fact that experience with my own veneers (after having sensitivity free bonding for nearly two decades) and now having permanent temperature sensitivity, I can definitely admit to being a little reticent when it comes to discussing the irreversibility of the procedure.
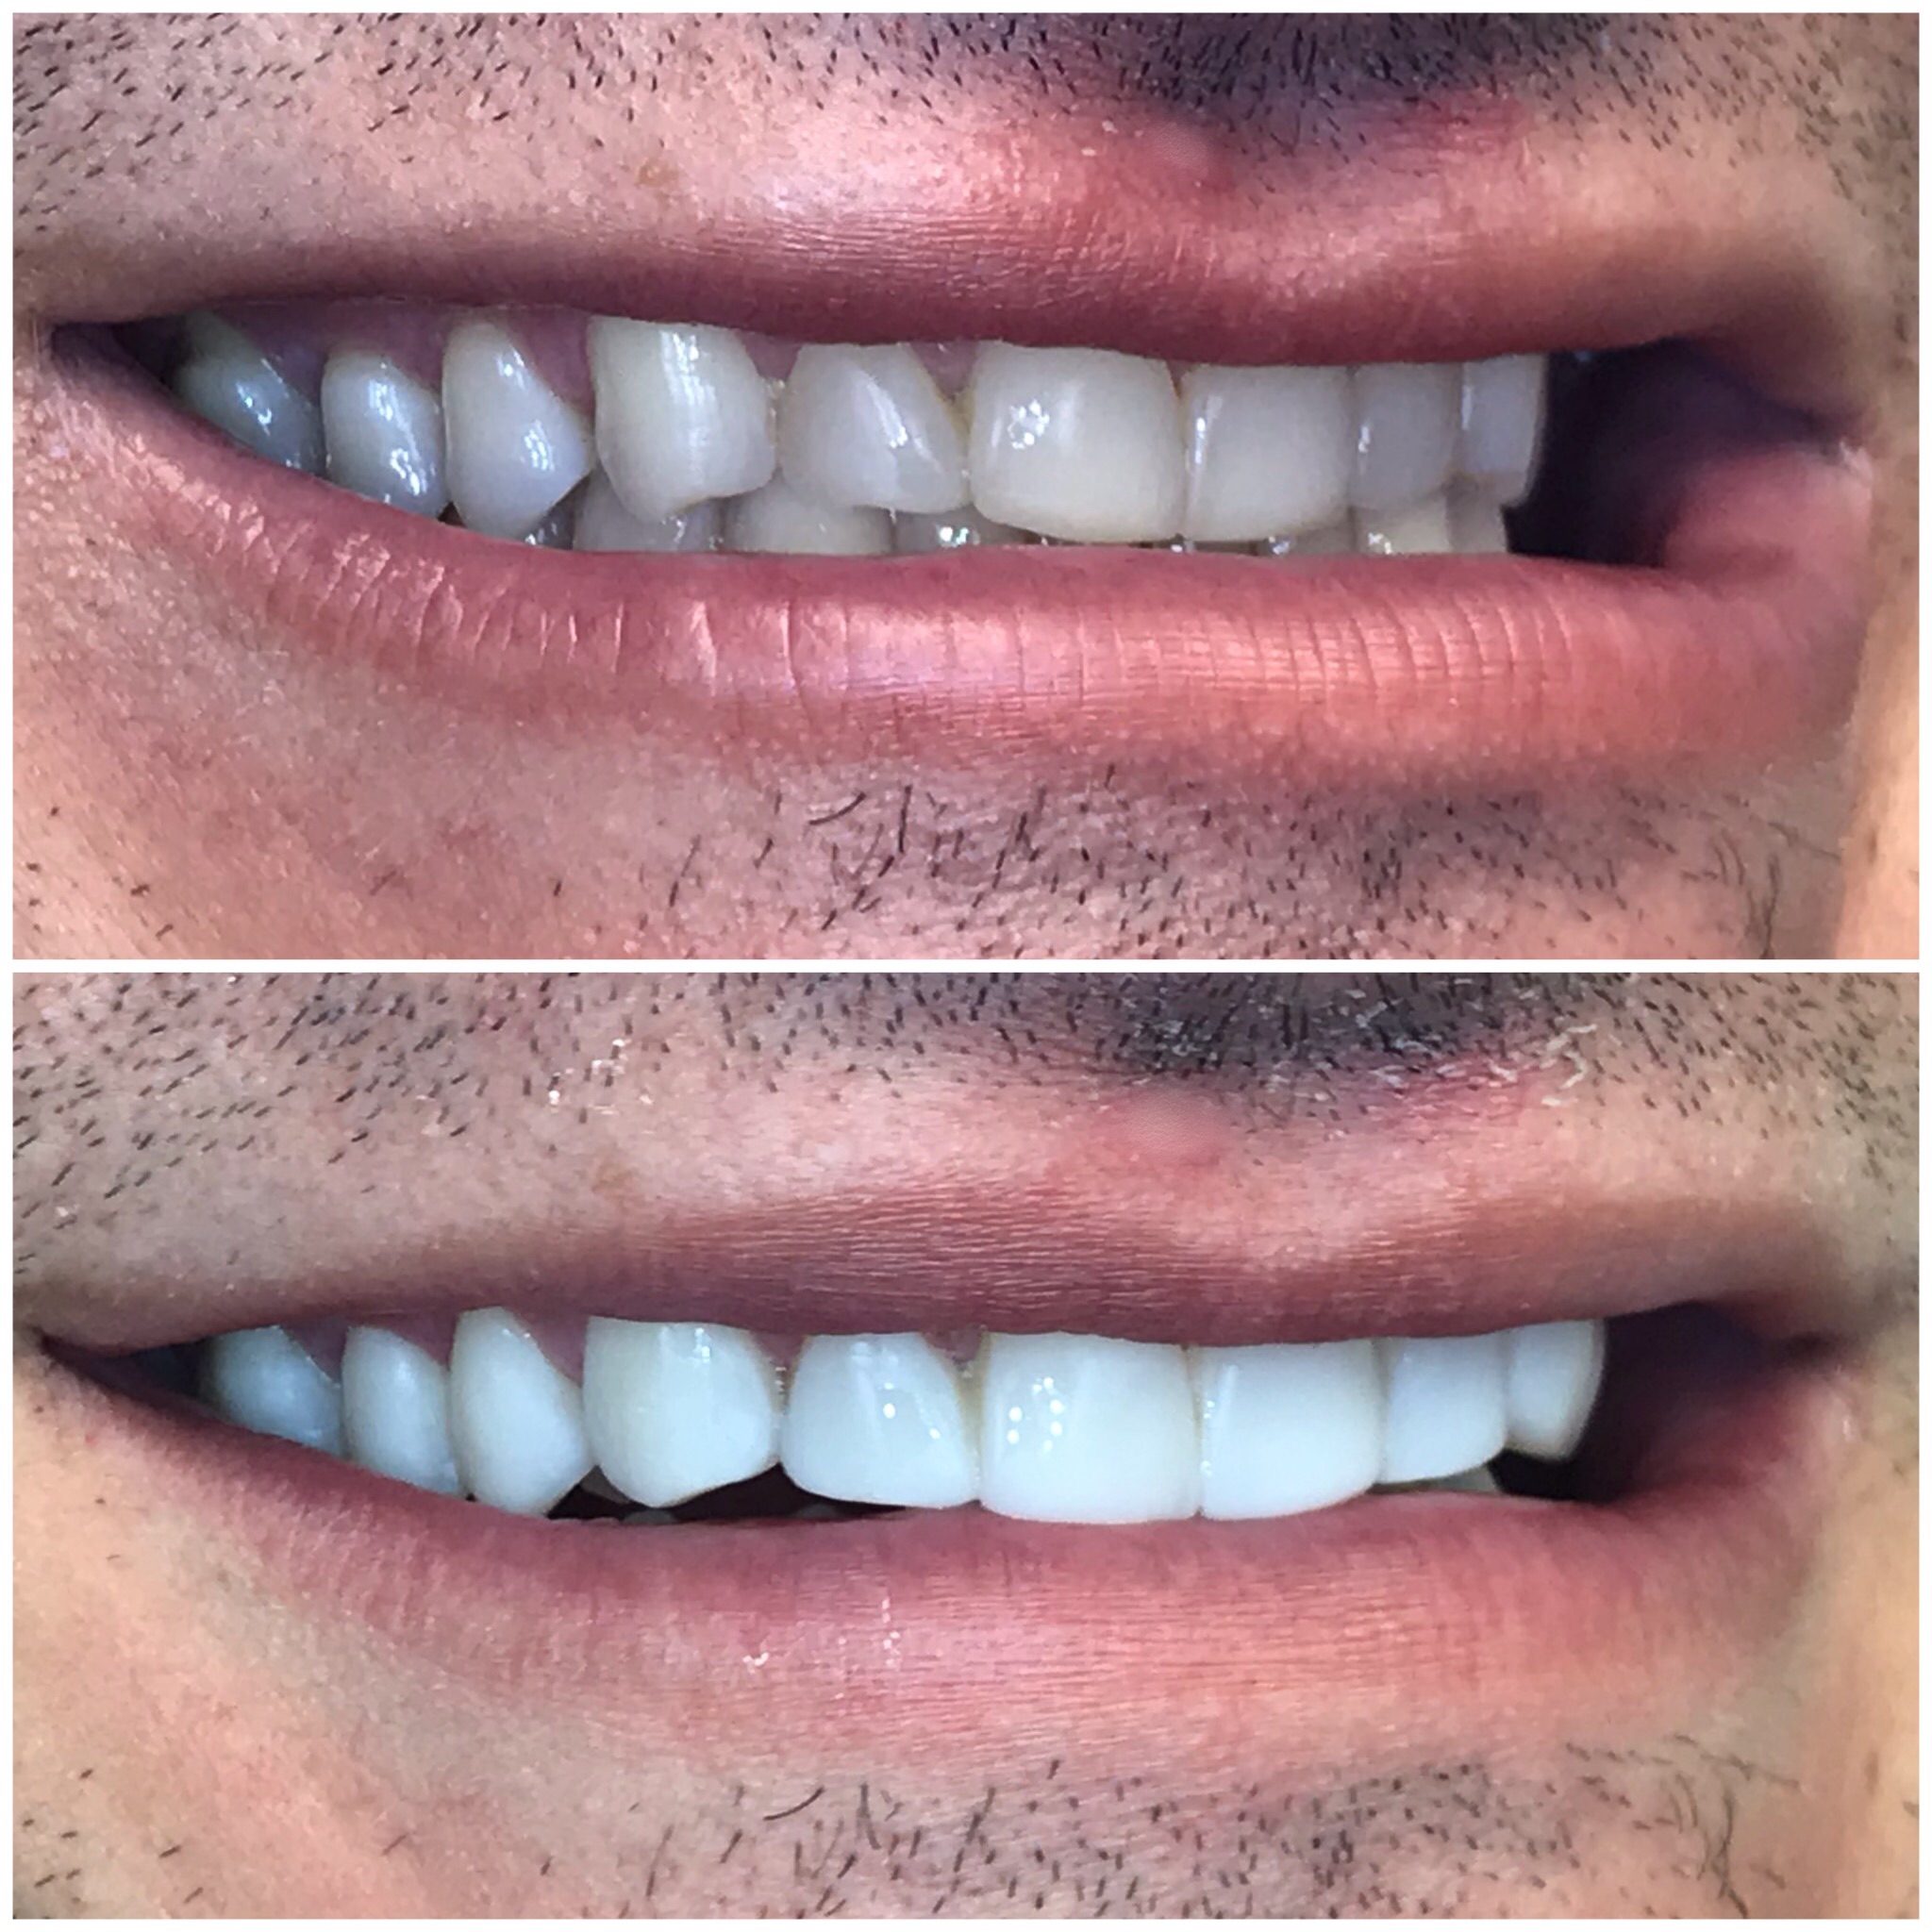
As a provider who wants to respond to my patients whose primary concern is a cosmetic one, I like to ask myself the following questions: Firstly, should our younger generation have to compromise their esthetics until they have the funds available? And secondly, should I be removing natural tooth structure in a permanent way on patients who may have perfectly healthy teeth? With the new materials and techniques available for cosmetic bonding, I believe we can all win: providing a minimally invasive and affordable alternative for the growing demand of cosmetic dentistry, while still allowing the option for porcelain down the road. (Figs. 1 and 2)
Fig. 1

Fig. 2

In this article, I will discuss the challenges in case selection for dental bonding, the different supplies and materials currently available on the market to treat a variety of cases, and my restorative techniques. This is not written to deter anyone from performing the tried, tested and true techniques of porcelain veneer application, but simply as a means of offering another option which may make treatment easier and more acceptable to our patients.
CASE SELECTION
For any type of cosmetic procedure, a comprehensive initial examination is essential. This not only helps assess the condition of the smile, but it also gives the patient the opportunity to communicate their smile goals and build a trusting relationship with their dentist. In my experience, the chief complaint of the patient can often be broken down into three categories: colour, crowding and spaces.
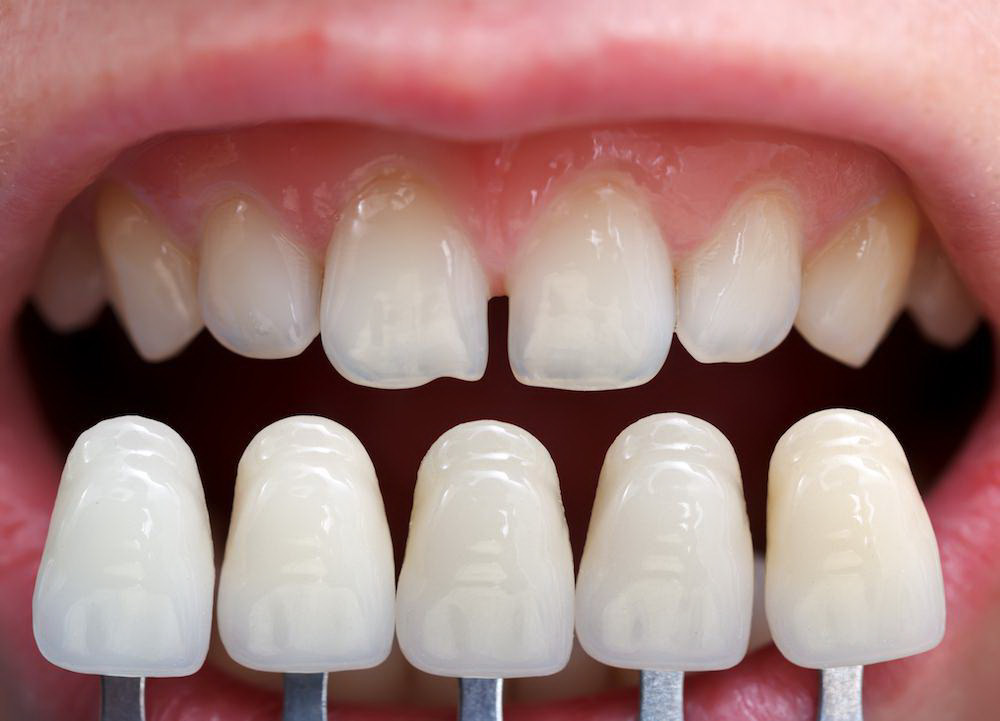
Colour: The shade guide is a simple but useful communication tool to determine a baseline and to see whether a pre-operative whitening treatment should take place or not. (Figs. 3 and 4) If a patient has white spots within the enamel, I assess the extent and the depth of the defect and chart it. At this stage, I am also looking for the source of the discolouration and whether the stain is intrinsic or extrinsic in nature. If the patient is a heavy smoker, or a coffee or red wine drinker, it is best to have this documented and the patient cautioned that bonding can discolour with these lifestyle habits and it will require slightly more maintenance should they move forward with the procedure.
Fig. 3
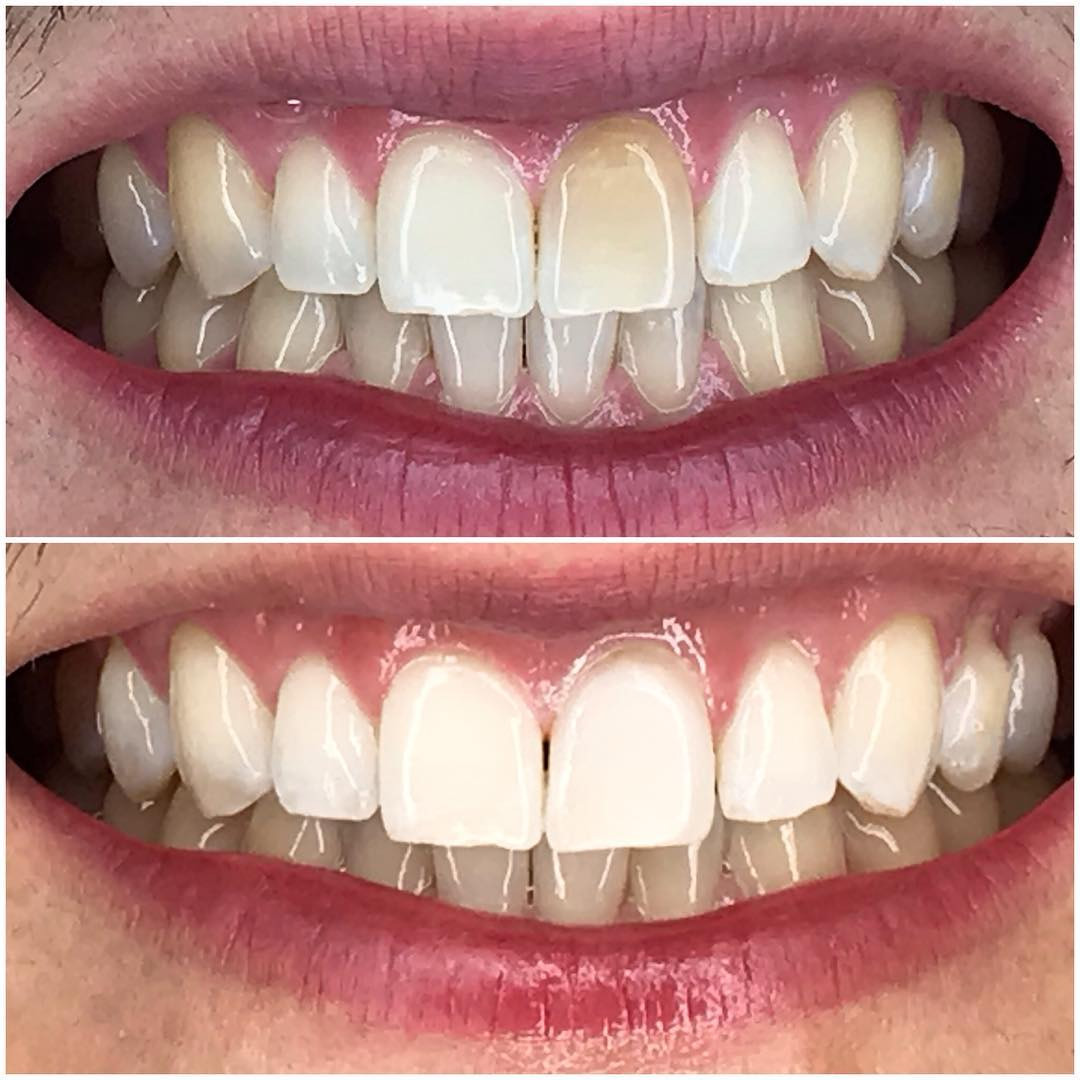
Fig. 4
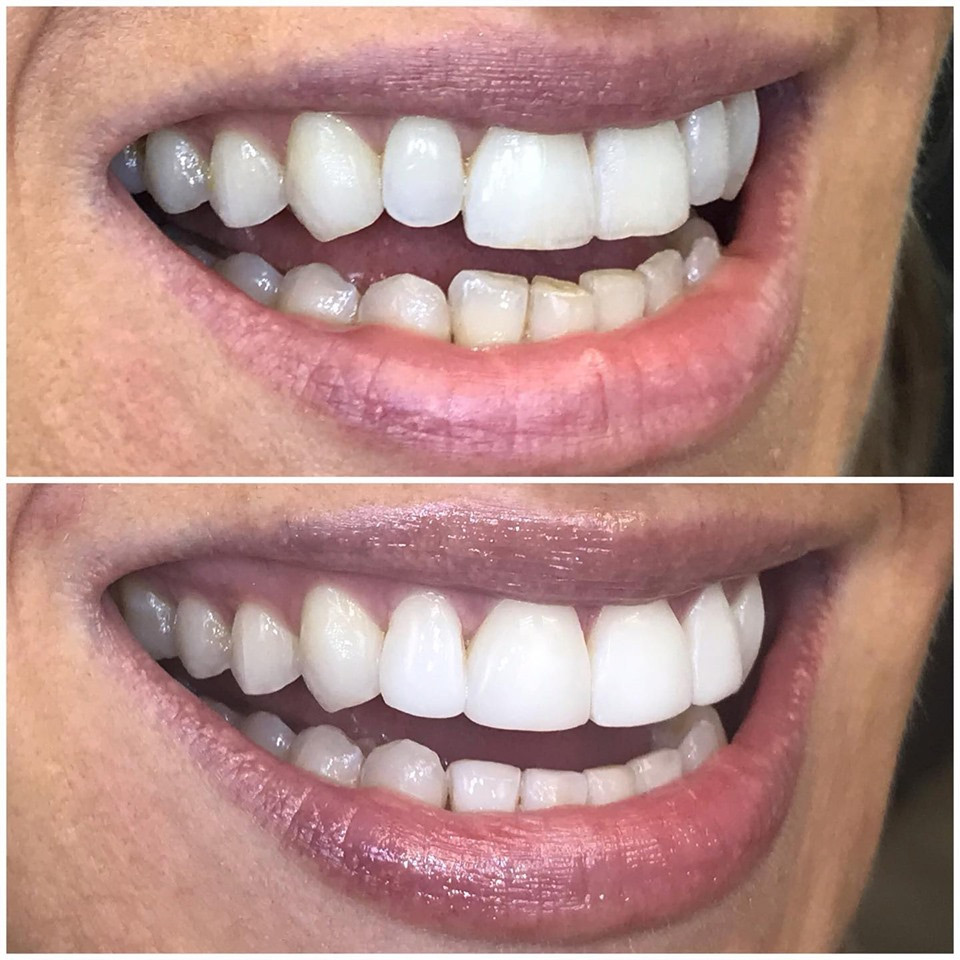
Crowding: The extent of the dental crowding mesio-distally as well as any significant projection bucco-lingually must be determined. Is the midline of the central incisors aligned with the centre of the face? Sometimes I like to use a long string of dental floss placed along the patient’s face from the forehead to the chin including the tip of the nose to help determine any minor deviations in the upper and lower arch midlines. Is the crowding symmetrical or is it localized to one tooth only? Does the crowding affect both arches? At this point in the examination, I am looking to see if pre-operative orthodontic work is necessary and if this is something the patient is willing to commit to. Do they simply want a quick fix? Are they willing to sacrifice a minor amount of tooth structure to obtain the desired result? Are they willing to commit their future to wearing a retainer? In my experience, I have found that I must review these options with the patient and properly inform them of all the variables as well as the advantages and disadvantages of each alternative. (Fig 5)
Fig. 5
Spaces: I think for the majority of us who enjoy performing cosmetic bonding, the most challenging aspect of diastema closures is symmetry. For those of us who struggle with achieving symmetrical results when closing gaps free-hand, a diagnostic wax-up and putty can be a useful tool in obtaining symmetry without the struggle. For patients with time or cost constraints (depending on the lab, the diagnostic wax-up can be pretty pricey), an alternative would be to measure the size of each tooth as well as the size of the diastema, and then calculate the final size that would be achieved with bonding. In my experience, the more teeth involved, the better the results, as it can provide a more balanced appearance across a wider surface. This hides any symmetry flaws and creates a more natural result overall. The second greatest challenge in diastema closure is occlusion. When verifying the bite during the initial clinical assessment, I take note of the inter-arch relation and whether the bite falls within the negative space of the diastema. Is it a very closed bite? I may use a probe to determine the amount of space available for material addition. If there is limited space, the bonding material will be very thin and may fracture, or it will have to be built-up significantly leading to esthetic challenges. I communicate these issues to the patient. I show them their bite in the mirror, and then inform them of the higher risk of bonding fracture or chipping in this scenario, as well as orthodontic alternatives to closing the space. I’m always careful to caution them that if there is a significant variation in the size of the anterior incisors (as with peg laterals), bonding may still be required post-orthodontics to achieve the desired result. In these cases, should the patient move forward with bonding, it is best to recommend a nightguard to ensure the longevity of the results. (Figs. 6,7,10)
Fig. 6
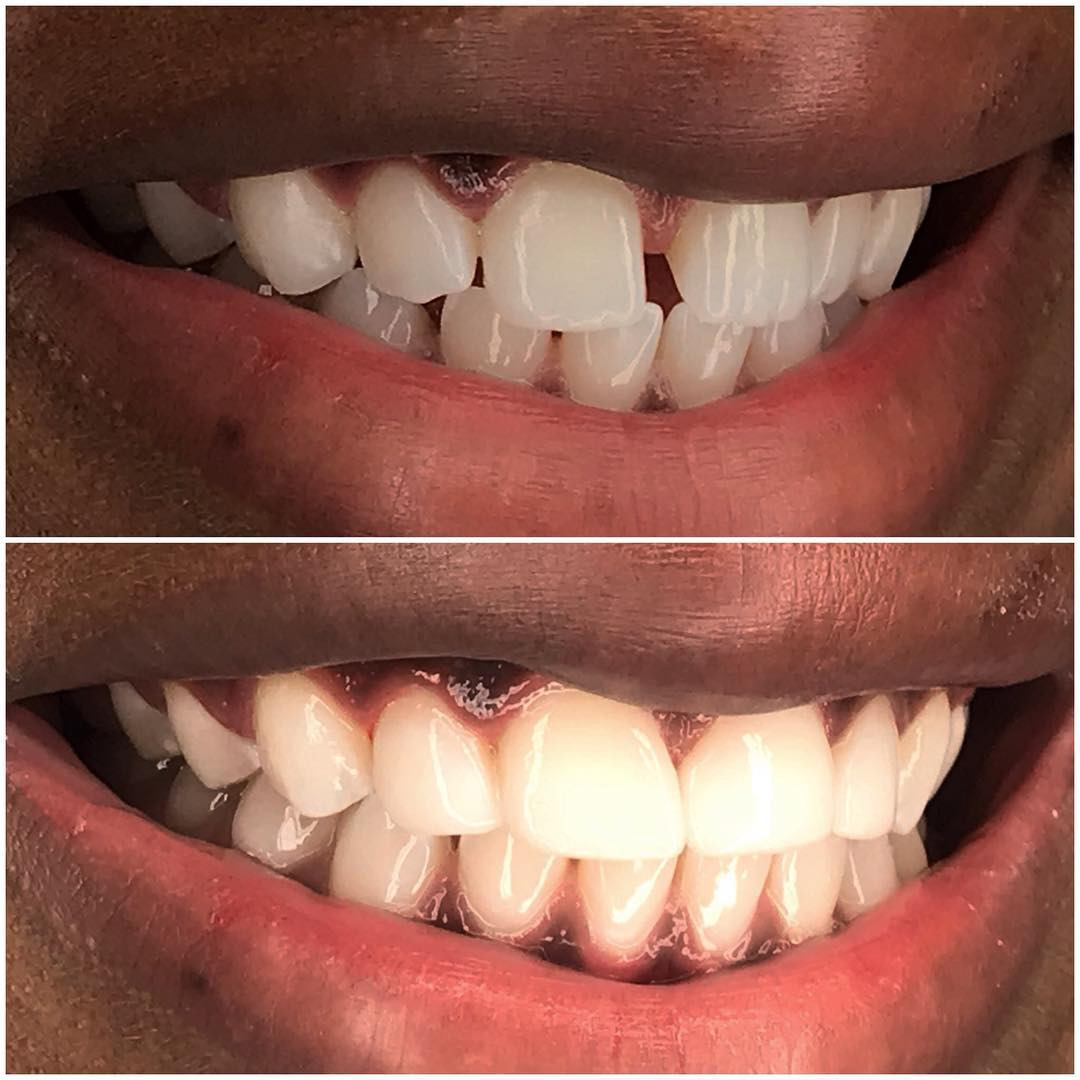
Fig. 7

Fig. 8
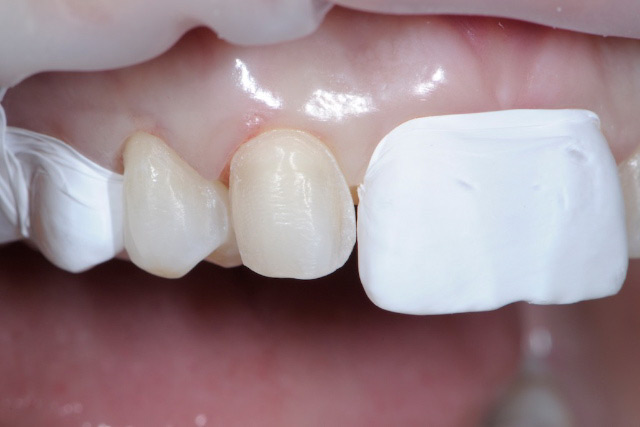
Fig. 9

Fig. 10

After addressing which general category the patient is associated with, I begin to evaluate the overall health and architecture of the tissues. If the patient is showing signs of uncontrolled gingivitis, bonding would not be the ideal recommendation until the tissues are healthy and stable. The patient is informed that inflamed gingiva will likely bleed during a bonding procedure, causing instability and discolouration in the material, as well as reduced longevity of the treatment.
Often, I find when a patient is not happy with the appearance of their smile, they are less likely to invest the time and energy into maintaining it. This being said, just because a patient may not currently have the habits in place to maintain their smile doesn’t mean they aren’t a candidate for bonding. In fact, after the bonding procedure is completed and the patient is thrilled with their new smile, I usually find there to be a drastic improvement in their overall care and hygiene maintenance. I am sure to communicate the importance of home care in the initial examination but also keep in mind the psychological evolution that will undoubtedly take place after such a significant esthetic change.
Next, the gingival heights of each anterior incisor as well as the smile line of the upper lip must be noted. Does the patient show a significant amount of gum when they smile? Does this trouble them? At this time, I typically like to chart any asymmetries in the gingival architecture and I am careful to point them out to the patient. Pre-operative periodontal surgery should be discussed as an alternative, as well as the short-term option of Botox that can be used to lower the height of the upper lip line that would assist in hiding the gingival asymmetries or excessive gum show.
The final phase of the case selection is the psychological assessment. The following questions should be asked to get a better idea of the patient’s cosmetic psychological history: Has this patient had any form of cosmetic procedure done in the past? Have they had bonding before? Have they ever whitened their teeth? And outside of the dental world, have they ever dyed their hair? Made a significant change to the length of their hair? Modified their face in any way with surgery or injectables? Have they invested in permanent makeup or tattoos?
This helps me gauge whether or not the patient acclimates well to change. If there is something significantly wrong with their smile that they simply loathe looking at themselves in the mirror, then in all likelihood, any improvement of their smile will be welcomed with a flood of happiness. However, if this patient seems to be highly demanding of esthetic results, it is better to know sooner rather than later and properly account for time as there will likely be a longer amount of time spent in modifying the bonding at the end of the treatment. Keeping their expectations realistic could be the most challenging of all and comes down entirely to the communication between the patient and the dentist.
MATERIALS FOR CLINICAL EXCELLENCE AND SIMPLICITY
A clinical case is described for a patient requiring bonding on teeth 16 to 26. (Figs. 11 A-L)
Fig. 11A

Fig. 11B

Fig. 11C

Fig. 11D

Fig. 11E

blend colour cervically.
Fig. 11F

Fig. 11G
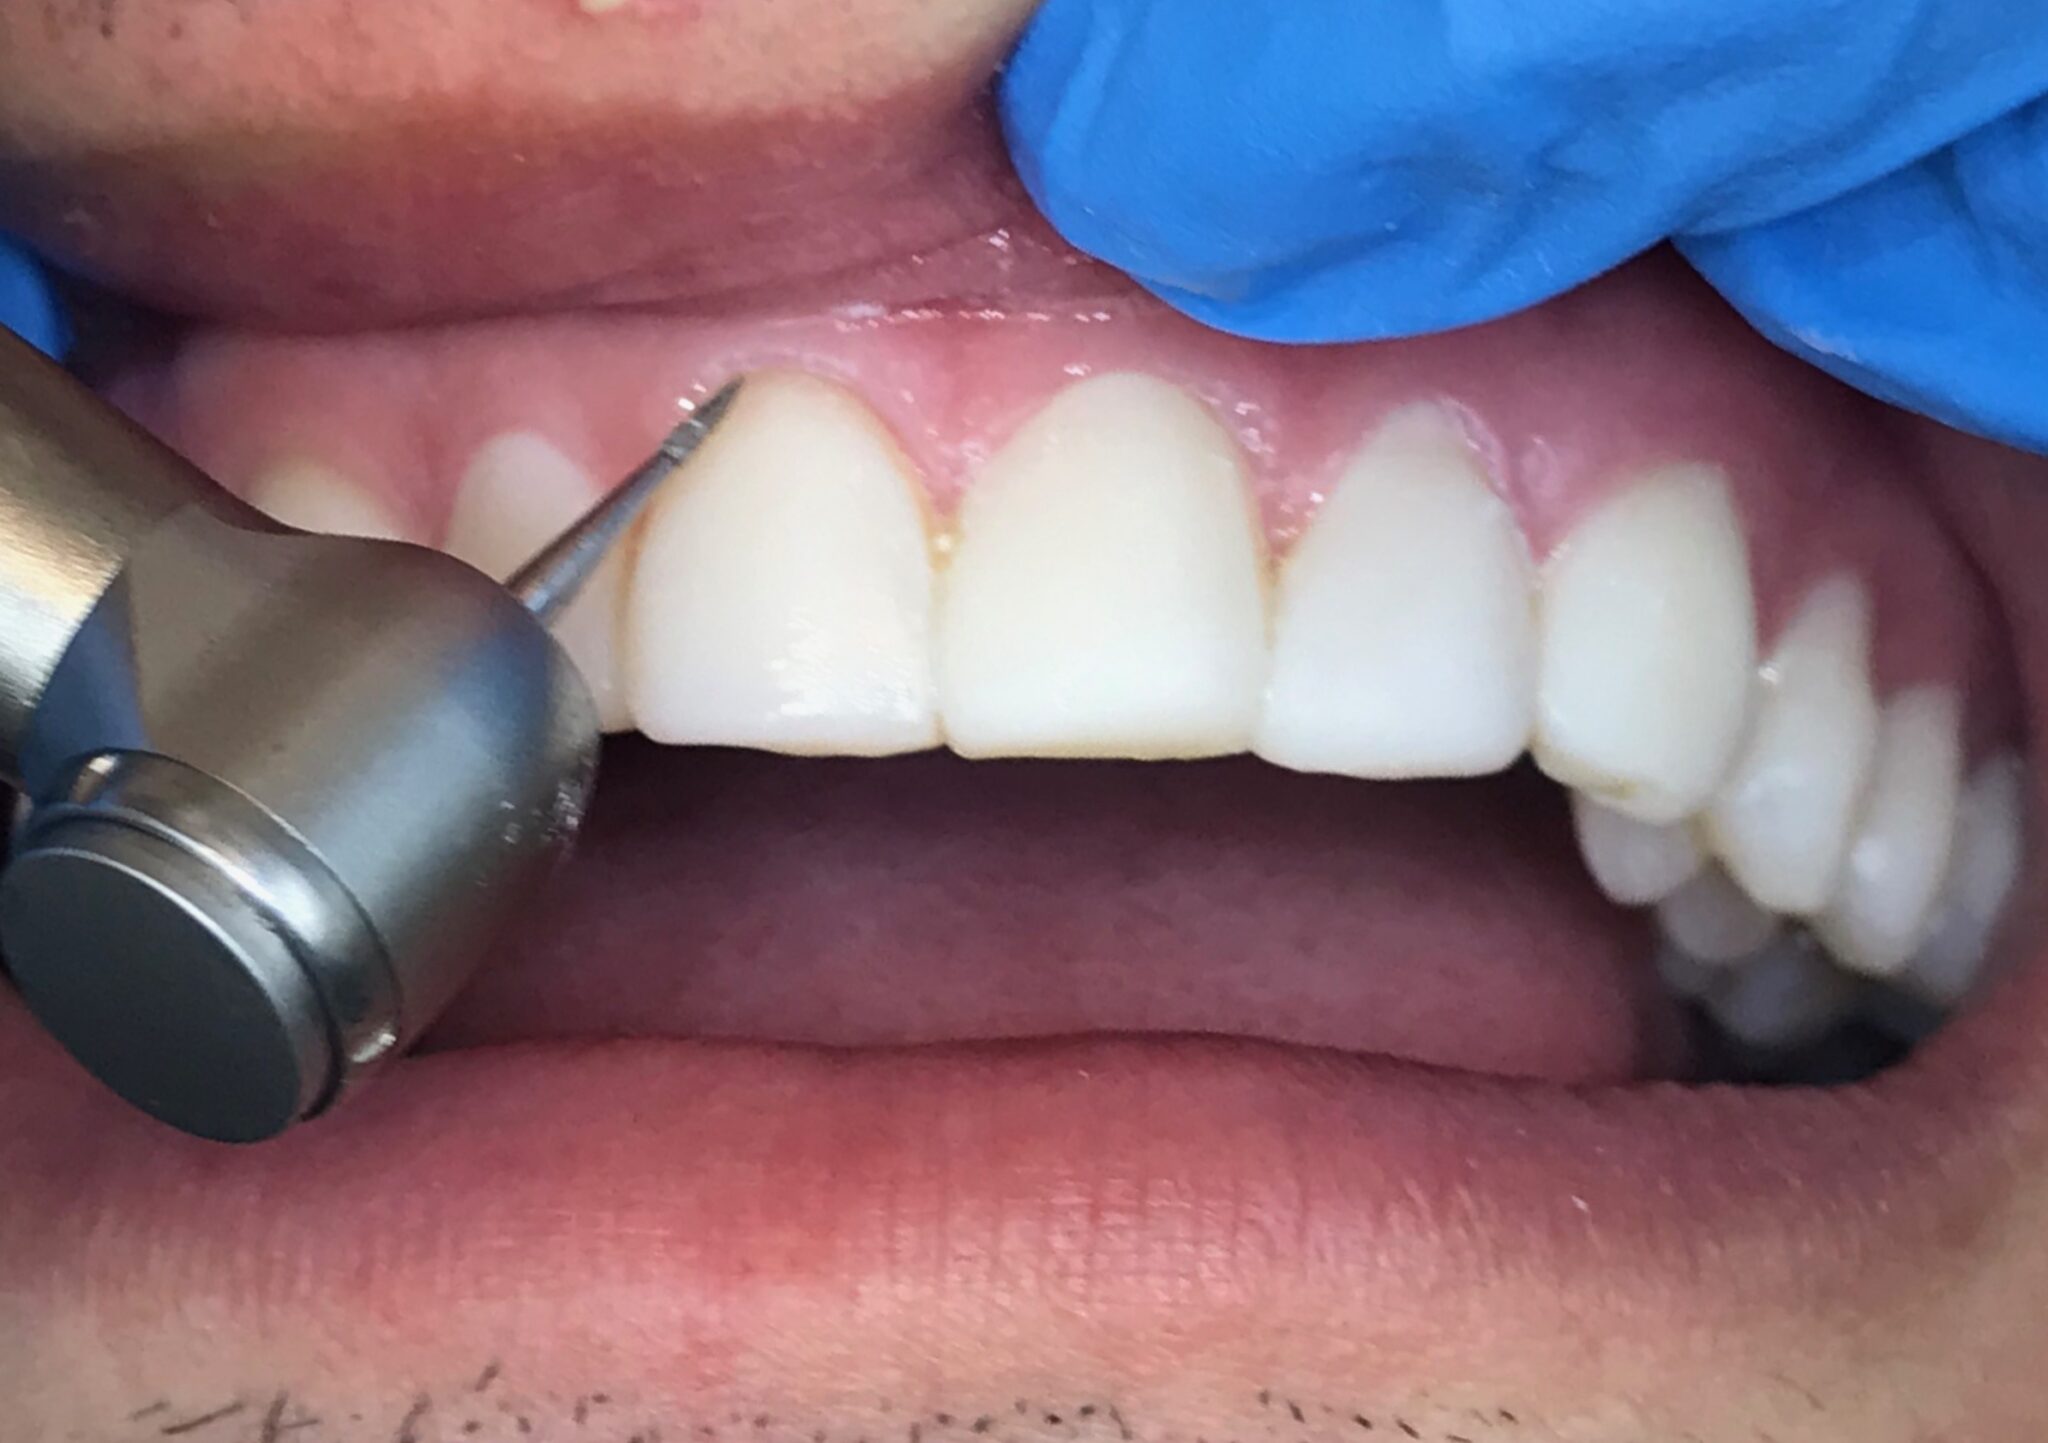
Fig. 11H
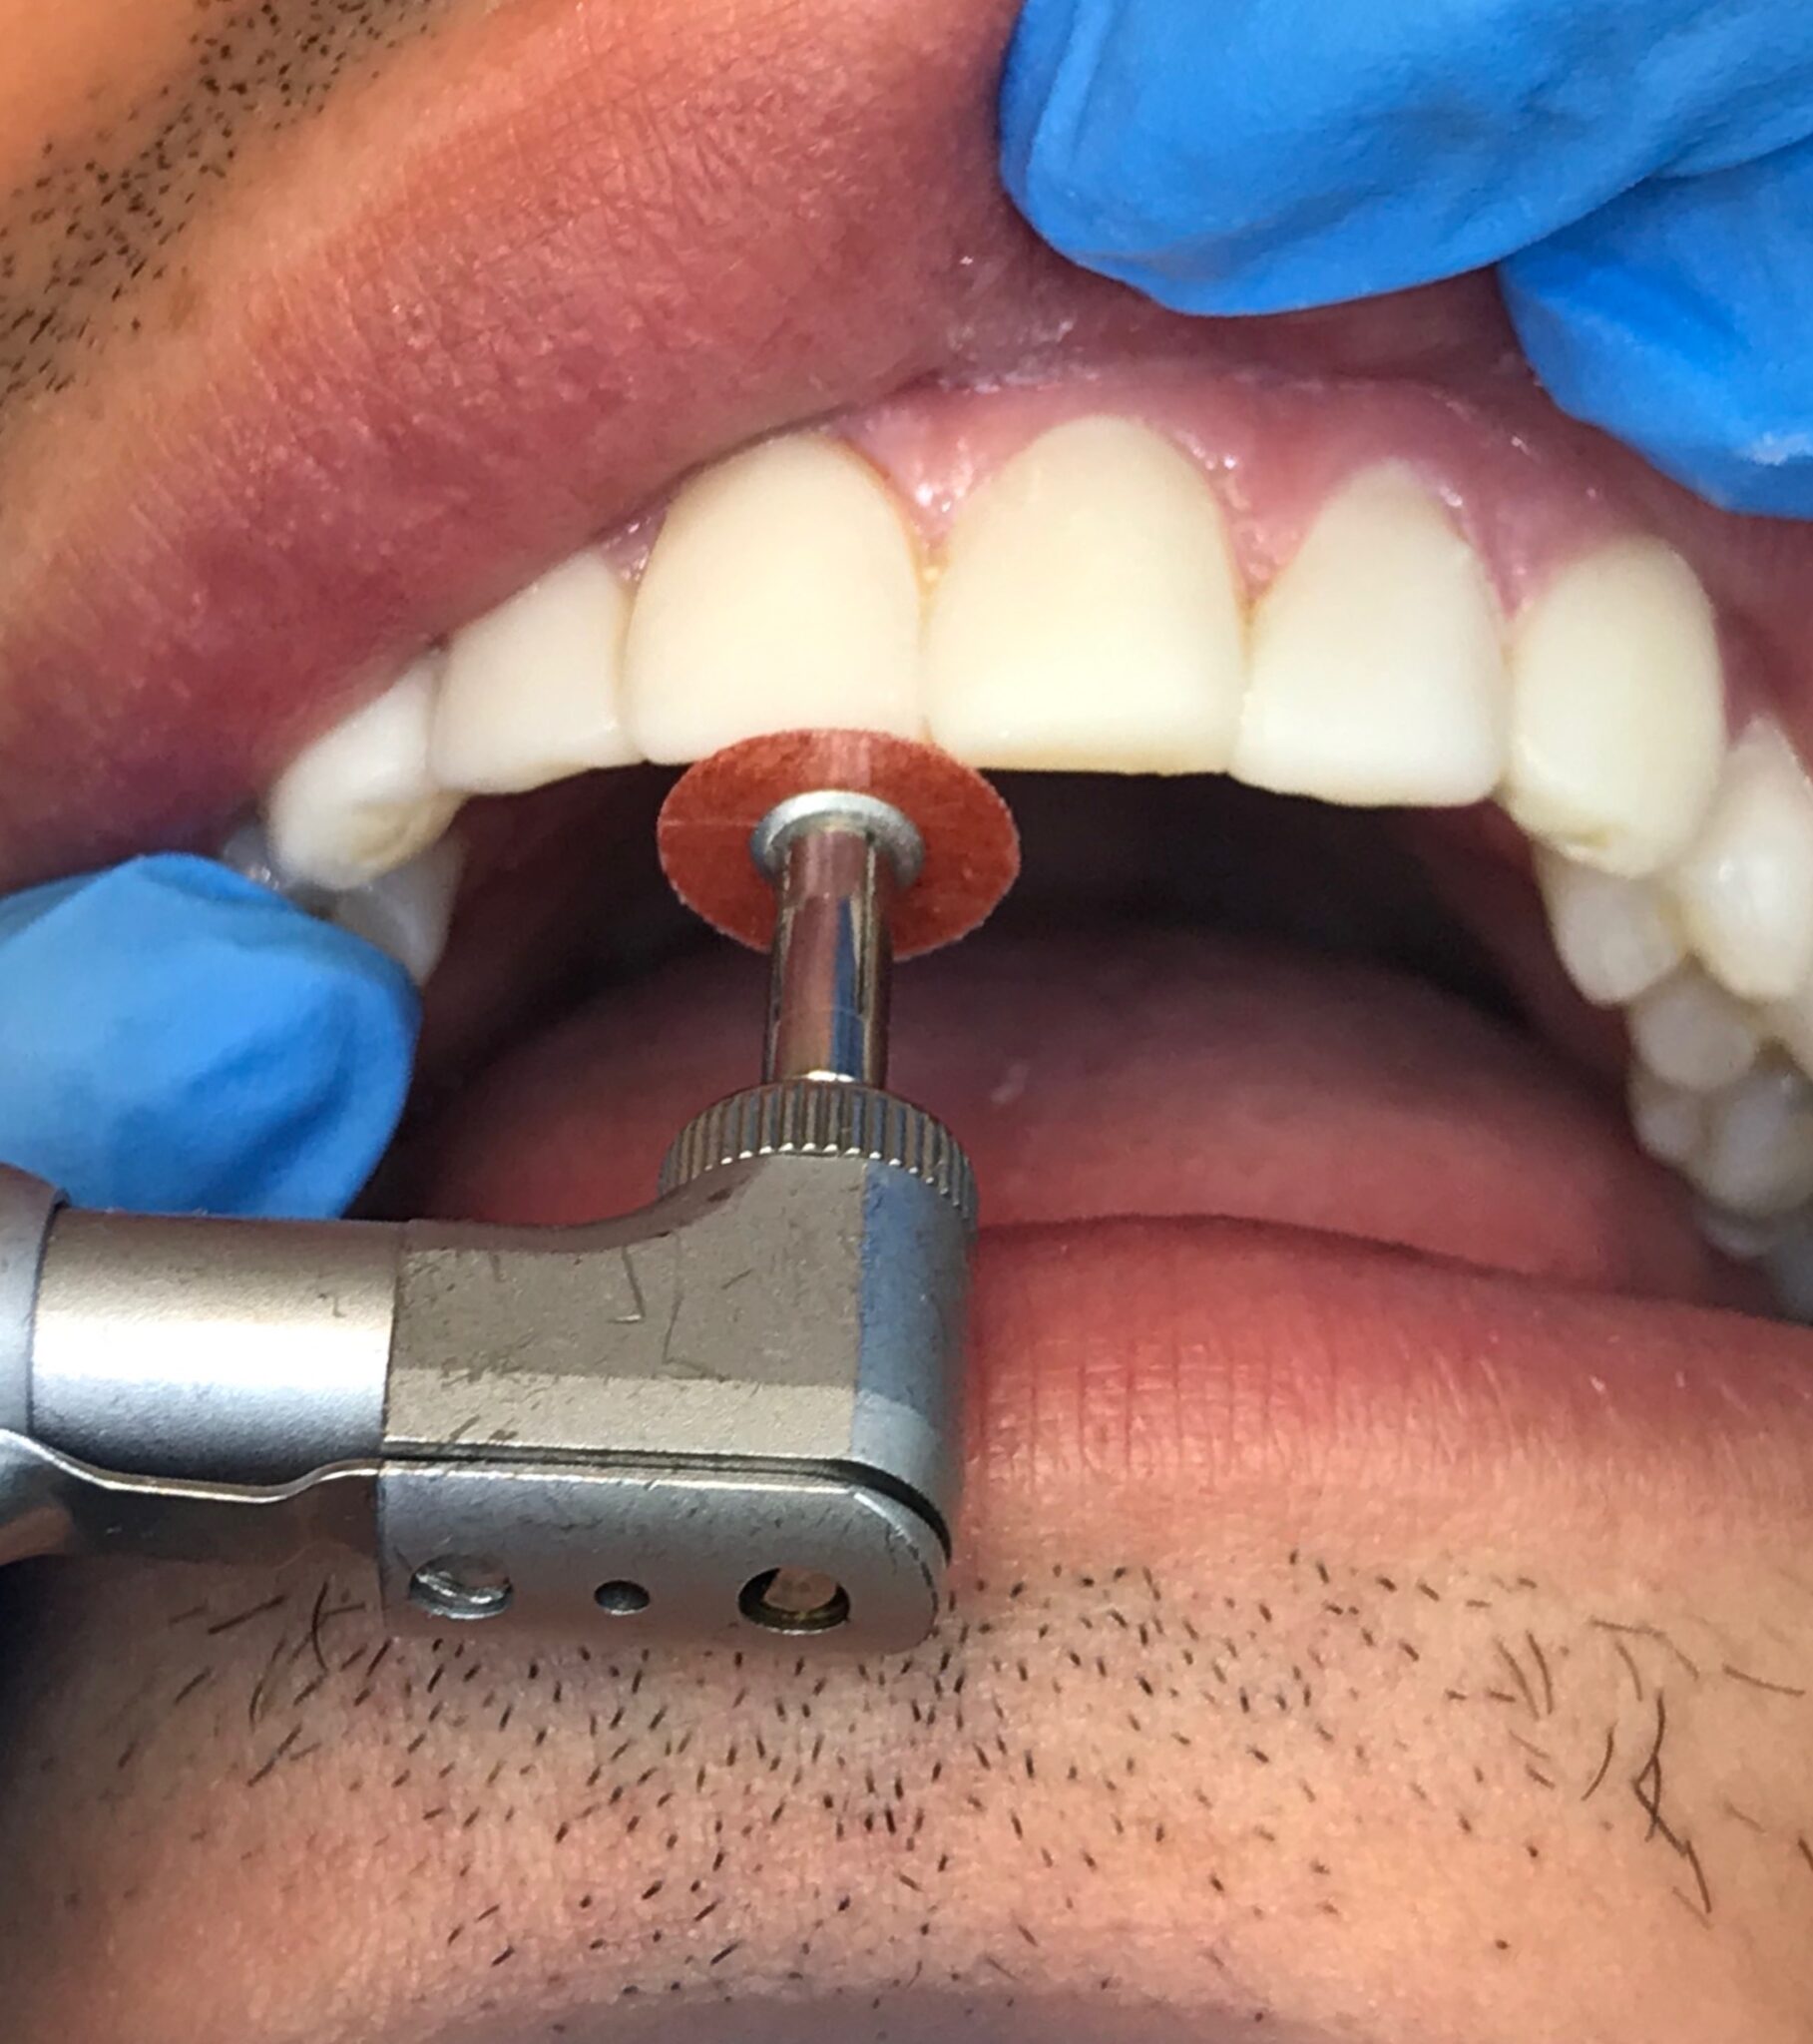
Fig. 11I

to close the small black triangle between 11 and 21 and allow seamless adaptation at the gumline with G-aenial Universal Flowable
composite in shade BW
Fig. 11J
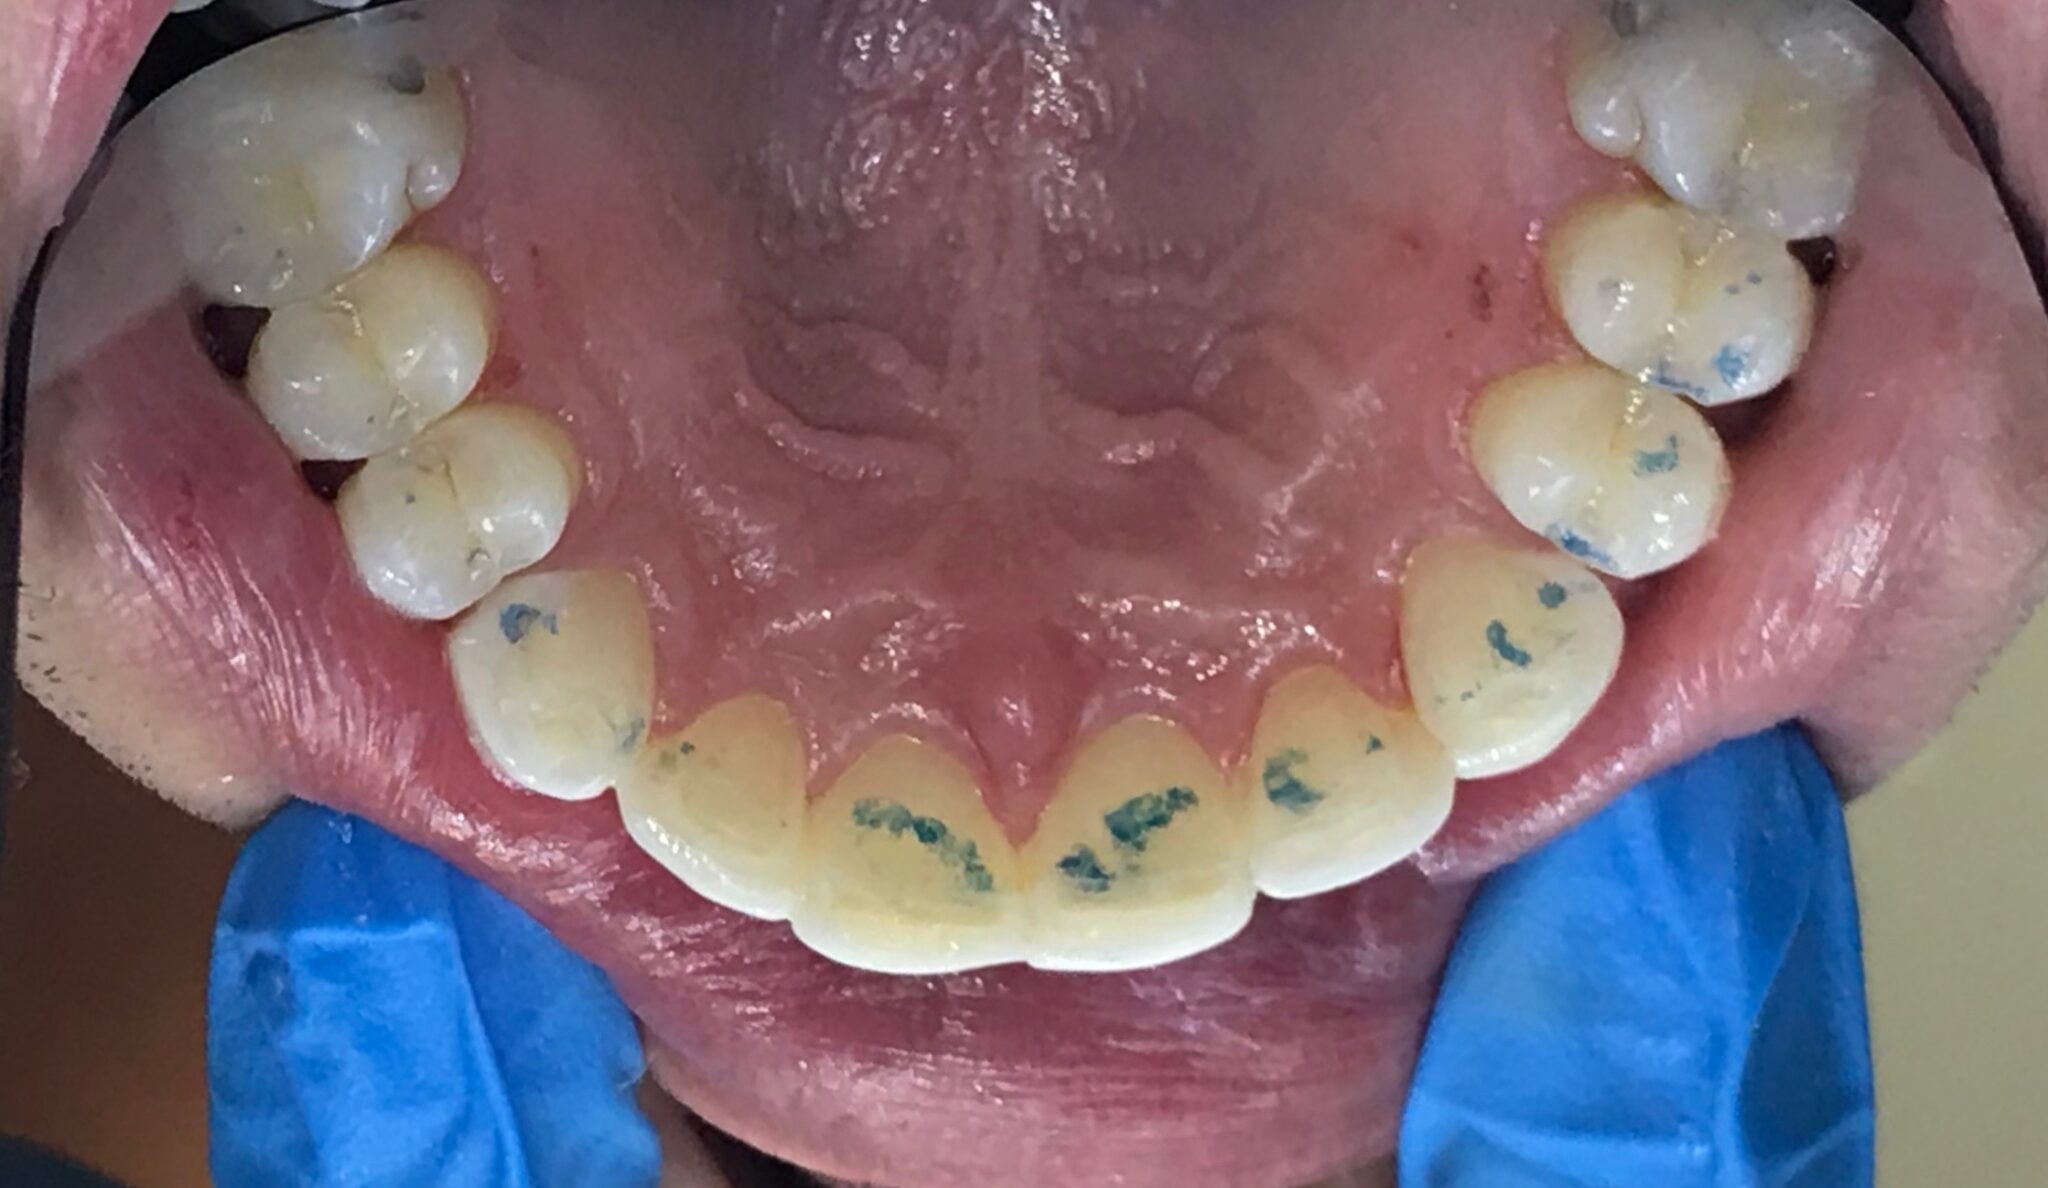
Fig. 11K

Fig. 11L
As dentists, we often become very comfortable with the types of materials we have in our arsenal and can be reluctant to try new products. The following is a short list of some dental materials that I’ve used in my practice that have helped simplify my bonding techniques.
Burs: For any form of reduction or minimal preparation, a medium coarse diamond I find is a simple way to lightly buff the enamel prior to etching, or for making minor adjustments to the tooth structure to enhance symmetry prior to bonding Matrix: In dental school we were taught to restore the interproximal of anterior teeth with translucent mylar strips, but I find these to be very linear compared to the natural curvature of the interproximal surface of an incisor. Instead, I use teflon tape on the adjacent tooth to not only reduce the risk of bonding the teeth together and maintain a relatively passive interproximal contact, but also to allow for adequate access with the dental instrument to push into the space (should there be a diastema) and create proper contours freehand. Teflon tape can be purchased very inexpensively at any hardware or home supply store, and it is a life-saver. (Fig. 8)
With diastema closure I use the Bioclear Matrix system. As opposed to a mylar strip, this translucent system is designed to seamlessly restore the natural anatomy of the tooth structure by providing the curved architecture within the matrix itself. It can be used with flowable and/or packable composite and extends across the full interproximal surface with perfect adaptation at the gumline. Barely any adjustments are needed after using this system. (Fig. 9)
Wetting Resin: To avoid composite sticking to the instrument, causing breaks or pulls in the material during sculpting, I use a small drop of wetting resin (a very watery liquid form of composite) placed on my non-dominant gloved hand. Then I dip my instrument into the wetting resin to use in direct contact with the composite that has been expressed onto the tooth. This creates a more slippery surface to work with, allowing the material to be guided more easily with the instrument. Any excess can be removed from the instrument with gauze. This is an excellent alternative to dipping the instrument in adhesive, which can cause instability and reduced longevity of the composite resin.
Composite resin: There are some excellent cosmetic composite resin materials with high polishability, colour stability and longevity. My favourites include GC America’s G-aenial Universal sculpt and flowable composites (excellent chameleon effect for shade matching), Dentsply’s TPH Spectra (less sticky, with a high polishability), Cosmedent’s Renamel Microfill (only available in syringe format but has a great finish and sculptability), and Clinical Research Dental’s Evanesce composite (beautiful shine, and colour options for esthetic cases).
When it comes to colour selection, the principles are quite simple: the more material you add, the denser the color, and the thinner the layer of composite means you may see the natural tooth shade through the bonding. I’m always mindful of this when using additive bonding techniques across crowded teeth with different proclined and reclined positions on the arch, because it can really end up throwing off the overall colour balance of the whole smile.
Layering colours can begin to make things complicated and, in my experience, most patients want their teeth to be only one color when they look at them (which breaks my heart after I spent tons of time layering). I start with the most reclined tooth and layer a maximum of two colours, whereas with the most proclined tooth, you usually only have room for one layer of composite before the smile begins to look too bulky. This takes a lot of practice and a solid understanding of colour theory, so I make sure to communicate this challenge to my patient before I begin in order to keep their expectations realistic.
As dentists, we can get very particular about layering different dentin, enamel, and translucent shades when bonding, but for a simple and beautiful result, I now stick with one shade and see where I need to touch up after I’m done (even if it means redoing one of the teeth). The beauty of bonding is that you can always remove and restart if you are not satisfied. If you are feeling very creative, try out Cosmedent’s Creative Color Tints which can add a lot of natural anatomy in tone and shade to the composite.
Polishing: After removing any excess composite with the super fine diamond burs, contouring to the desired shape, trimming away interproximal excess and ensuring a smooth gingival margin, I create a final shine and natural light reflection using 3M Sof-Lex polishing discs. By applying a consistent pressure across the whole surface, while being mindful of the line angles I worked so hard to shape, the different coarseness in the discs can create a truly natural look and feel to the smile. Finishing strips ensure a smooth glide with the floss interproximally, but when I get really stuck and the contact is too tight, I use the TruContact orange mini saw by Clinical Research Dental to open it right up, without needing to ruin the whole creation with a rogue bur!
COVERING THE BASES
When it comes to finally executing the treatment, informed consent is absolutely essential. For me, this step is critical to communicate all the risks associated with bonding prior to beginning treatment. The risks are minor, but they can come as quite a shock to an uninformed patient, especially the risk of chipping and staining of bonding. I always make sure to emphasize to the patient that biting into hard foods with bonding can cause the bonding to fracture, and that bonding will gradually stain over time. On average, bonding looks its best for the first three to five years but can last significantly longer if well maintained. It is important to set boundaries with the patient in your informed consent that limits them to a number of adjustments following the procedure should they be negligent. A good rule of thumb that I have implemented in my practice is to include two visits at no charge within the first year of treatment for any adjustments that should require less than an hour of chair time. Anything more involved following those visits can incur costs to the patient. This will motivate the patient to protect and maintain their bonding, while also giving them the freedom to adapt to their new smile without the commitment and fear of being charged all over again should something occur.
I also started documenting different angles of the smile with photography. Many patients forget what their original smile looked like prior to bonding and if they are experiencing even a minor form of shock, it is an excellent tool for communicating as well as record-keeping.
FINISHED PRODUCT
At the very end of the bonding procedure, I carefully check the occlusion in all directions of excursion with the patient seated upright. There should be limited or no contact whatsoever on the bonding to ensure longevity and to reduce the risk of chipping. I make sure that the patient feels that their bite is exactly as it was before the procedure (which is simple to do as usually there is no anesthetic). Then, I check with floss interproximally and smooth away any ledges that are causing the floss to shred. These small defects can cause excessive forces on the bonding that will lead to it to dislodge from the tooth surface over time. I always encourage the use of a Waterpik waterflosser to avoid this from happening in the future.
I make sure to advise the patient that food will trap very differently than it has in the past and that this is entirely normal. The patient may even have a slight lisp or change in their speech as they adapt to the new sensations of having bonding on their teeth. The lip will also sit differently, and their entire smile will be new. With any shock that may occur, advise the patient that they can return for adjustments but to give it several days to adapt and determine exactly what it is they are looking to modify. At the very end of the visit, I provide them with a list of instructions on how to care for their new smile, I take a final photo with different angles and a photo of the occlusion with the markings still on the lingual surfaces for record-keeping, and then I get ready to enjoy the moment of having just changed the life of a patient who now has newfound confidence with which to navigate their world!
Oral Health welcomes this original article.
About the Author
 Dr. Shannon Hobbs received her DMD at Université Laval in Quebec City. She completed a residency in Paris, France at the Hôpital Louis-Mourier in association with the Université Paris-Descartes with training in emergency treatment of medically compromised patients. Dr. Hobbs is a participating provider for Restoring Smiles, a foundation that offers free dental care for victims of domestic violence. She is also the media contact person for the Ontario Dental Association and a speaker for the Sjögren’s Society of Canada. She practices in Toronto.


