
Introduction
With ever-evolving digital technologies in dentistry, the level of sophistication and accuracy that can be accomplished today is unsurpassed. Dental laboratories seem to be leading the charge as they embrace the predictability of CAD/CAM generated fixed restorations. Similarly, many clinicians are replacing traditional impression materials with intraoral scanners. However, the consistent management of the gingival tissues prior to making a final impression remains one of the more challenging aspects of core supported crown and bridge. While there are many methods and materials that can be used to expose a crown preparation margin line, they mostly fall into one of two categories; subtractive or displacement methods. While many clinicians use subtractive methods, that is; tissue ablation utilizing lasers or electrocautery, the focus of this paper will be the use of gingival displacement techniques. When the tooth preparation’s finish line is equigingival or just inside the gingival sulcus, the displacement of the gingival tissues is critical for obtaining an accurate impression in order to fabricate a well-fitting core supported restoration. The goal of tissue displacement is to reversibly displace the gingival tissues in a lateral direction. This allows for adequate bulk of low viscosity impressioning material to flow into the widened sulcus to capture the preparation margin. Alternatively, this also allows for a digital scanner to clearly capture the margin without the negative affect of tissue encroachment.
The primary purpose of this paper is to review three basic techniques that can be used to achieve adequate gingival retraction to accurately capture a subgingival margin. The three techniques are single cord technique, double cord technique, and lastly the use of retraction paste. The secondary purpose is to describe the authors preferred technique to achieve excellent tissue management which allows for predictable impressions whether digital or analogue of multiple core supported preparations.
Single Cord Technique
This specific technique is still taught in most dental schools, and for this reason it will be briefly described here although it has a very limited clinical application. It is specifically indicated in patients with a gummy smile whose gingival architecture and biotype could result in recession with more aggressive retraction methods. The resultant recession could have significant aesthetic consequences in, for example, a patient who is being treated with a single tooth crown and has exaggerated lip dynamics and/or a gummy smile. As well it is indicated in patients who have a very shallow sulcus due to reduced biologic width. Many times, these patients have been described to have experienced altered passive eruption in one or more teeth. More aggressive retraction protocols in this type of patient would likely result in an encroachment of the biologic width leading to long-term localized inflammation around a newly inserted crown. The authors preference in cord is Ultrapak (Fig. 1).
This single cord technique is usually described as follows. A single cord is carefully placed in the sulcus, left in situ for a period of time usually no less than five minutes and finally removed before making the impression. Once the cord is removed, gingival displacement of about the width of the cord used is achieved. In cases where there is a deep sulcus, the tissue may collapse when removed or it can collapse on top of the cord. In these clinical circumstances, the single cord technique is less effective and alternative methods of tissue retraction should be considered.
The Double Cord Technique
The double cord is likely the most popular and predictable method of tissue displacement. The name of the technique is descriptive in nature in that two distinct cords usually of differing sizes are actually used. The selection of cord is dependant on the biotype of the patient and tooth being prepared. Smaller cords are usually needed for mandibular anterior teeth due to the limitation of the gingival sulcus around these circumferentially small teeth. The first cord is typically one of smaller diameter than the second cord. A #00 cord suits most teeth, #000 for mandibular anterior due or in patients with thin biotype. The authors preference for packing is to lasso the tooth, holding the cords ends taught on the facial and applying slight apical pressure while packing from the lingual. This usually results in the cord packing/flossing itself through the proximal sulcus leaving the facial to be cut and tucked in so the free ends do not overlap. This is repeated in the same fashion with the second larger diameter cord, which is usually one to two sizes larger than the first cord. Theses cords can be soaked or packed through a hemostatic solution to aid in isolation of the preps. Size #1 or #2 depending on how much lateral displacement is deemed necessary. For mandibular anterior or thin biotype situations, the second cord might be a #00 or a #0. The free ends can be left long to facilitate easy removal prior to making impressions. After a sufficient amount of time, no less than five minutes, the second cord is carefully removed by teasing one of the loose end and pulling it out in its entirety. The preparation is carefully examined to ensure adequate displacement and hemostasis has been achieved. If further displacement is required due to isolated gingival rebound a small piece of a larger diameter cord can be placed for approximately 1 minute. The end goal of this procedure is to be able to visualize the preparation margin in its entirety and to create a space around the tooth, in which light bodied impression material can flow to capture the preparation or where an optical impression can be captured.
Summarizing Steps For Double Cord Technique
1. Complete tooth preparations ensuring distinct crisp margin lines.
2. Lightly pack presoaked primary cord, typically a 00 cord ensuring no overlap of cord ends.
3. Refine preparations as required to level of first cord.
4. Rinse/dry preparation, apply and abundant amount of hemostatic solution with preferred delivery method around the prepared tooth.
5. Lightly pack a dry secondary cord, typically a 0 or 1 cord leaving tail end long for easy removal.
6. Cover preparation with a once folded 2×2 gauze, ask patient to bite on this to prevent wash out of the hemostatic solution and to avoid the negative taste
7. Leave the operatory for five minutes (great time to conduct a recall exam or to enjoy a warm beverage).
8. Remove gauze, remove secondary cord, rinse and lightly dry, evaluate tissue displacement and hemostasis, reapply hemostatic solution and gently scrub the widened sulcus, rinse and thoroughly dry.
9. Make impression either digital or analogue.
Retraction Paste
The use of retraction paste in dentistry to aid in tissue management of crown and bridge procedures is becoming more popular and mainstream. This cordless retraction material is supplied in a specialized dispenser and is injected into the sulcus to displace the gingiva. These pastes are considered a more passive technique as they aren’t packed into the sulcus and therefore are less traumatic to the gingiva than conventional retraction cord. These materials are also advantageous when capturing a digital impression for CAD/CAM prosthesis as the artifacts that may be created by retraction cord will not be scanned which will ensure a clear crisp digital margin line. The author prefers the delivery system and ease of use of Traxodent (Premier) (Fig. 2), which contains 15% aluminum chloride as well as Hemodent (Premier). Traxodent paste flows quite easily when injected into the sulcus and produces gentle pressure (Fig. 1). It can be used on its own, or in combination with cord if the clinician prefers. It can also be used with Premier Retraction caps (Figs. 3 & 4), which are hollow stiff cotton caps designed to enhance gingival retraction and assist in hemostasis. This technique is best suited for up to three preparations for predictable results.
Fig. 1

Fig. 2

Fig. 3
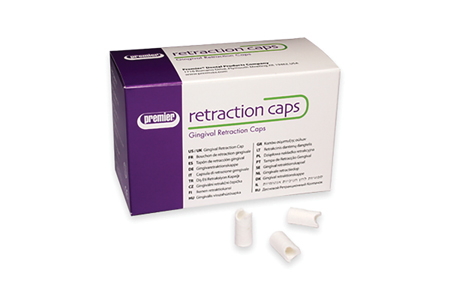
Fig. 4

Summarizing Steps For Retraction Paste Technique
1. Complete tooth preparations ensuring distinct crisp margin lines.
2. Rinse/dry preparation.
3. Syringe retraction paste around the preparations into the sulcus.
4. Seat appropriately sized Premier retraction caps onto prepared tooth.
5. Have patient bite into retraction cap with firm pressure.
6. Leave the operatory for five minutes (great time to conduct a recall exam or to enjoy a warm beverage).
7. Remove retraction caps.
8. Completely rinse all retraction paste ensuring adequate tissue displacement and hemostasis.
9. Make impression either digital or analogue.
Primary Cord Retraction Paste Compression with Bite Registration
In life and in dentistry, we always strive to make a good first impression. Capturing a detailed impression of multiple preparations is quite challenging whether it be a traditional anologue impression or a digital scan. A tremendous amount of coordination of events and skill is required to predictably capture an accurate impression of three or more tooth preparations in one impression. With many polyvinyl impression materials, the clinician only has approximately one to two minutes to syringe the light body material into the sulci around all of the tooth preparations. This needs to be accomplished without trapping air bubbles that will inevitably settle on the margin necessitating a second impression. This authors preferred technique that allows for predictability in capturing an impression of multiple preparations is as follows:
1. Complete tooth preparations ensuring distinct crisp margin lines (Fig. 5).
2. Syringe bite registration material around each impression and over adjacent occlusal surfaces and ask the patient to bite with light pressure into it which will roughly capture the prep details (Fig. 6).
3. Pack primary cord, typically a 00 cord ensuring no overlap of cord ends.
4. Refine preparations as required.
5. Inject retraction paste into sulci over the primary cord of each prepared tooth (Fig. 7).
6. Align bite registration over preparation and ask patient to bite firmly into it as before (Fig. 8).
7. Leave the operatory for five minutes (great time to conduct a recall exam or to enjoy a warm beverage).
8. Remove bite registration.
9. Completely rinse all retraction paste ensuring adequate tissue displacement and hemostasis (Fig. 9).
10. Make impression either digital or analogue.
Fig. 5

Fig. 6

Fig. 7

Fig. 8

Fig. 9

It is the authors experience that this method provides more than sufficient amount of time to capture an accurate analogue impression of all preparations in an arch regardless if you are impressing 1 or 14 tooth preparations. If you are capturing a digital impression of multiple preparations and you find that nearing the end of the scan the tissue requires further retraction or hemostasis. You can reapply the retraction paste, have the patient bite back down on the bite record for a further few minutes, rinse and pick up with the digital impression where you left off. This allows for a stress free digital scan for both the operator and patient.
In conclusion, It has been said that what you see is what you get. This has never been more true than when making an impression in crown and bridge dentistry. If you can see the margin you can usually get it in your impression or scan. OH
Oral Health welcomes this original article.
About the Author
 Dr. Joseph Fava earned his DDS, MSc. and prosthodontic specialty certificate at the University of Toronto. His MSc focused on dental implants in the aesthetic zone. He currently instructs in the IPU at the UofT and is actively involved in clinical research. He maintains a specialty practice whose scope includes cosmetic dentistry, surgical and prosthetic components of dental implants as well as advanced restorative and reconstructive full mouth therapies. He is a distinguished Kois Mentor. He is also Co-director of the University of Toronto’s Implant Residency Program.
RELATED ARTICLE: Tissue Management in Restorative Dentistry: The “Super Pulsed” Diode Laser
Follow the Oral Health Group on Facebook, Instagram, Twitter and LinkedIn for the latest updates on news, clinical articles, practice management and more!


