Every time you plan a dental restoration, you have to decide: Is adhesive cement the best choice for this procedure?
Factors to Consider
All restorative materials can be bonded with adhesive cementation if following proper bonding protocols. Because adhesive cementation yields the highest bond strength, it is the preferred choice for the glass ceramics used in veneers or partial coverage restorations, given well controlled intra-oral conditions.
Adhesive cements work well with anterior restorations because they facilitate access and moisture control. For full-coverage retentive posterior restorations with a high-strength material, which tend to benefit from a quicker protocol, self-adhesive or conventional cements are also an option. For partial coverage restorations, non-retentive preparations, and low strength materials, adhesive cement is the only option; using self-adhesive or conventional cement may lead to premature restorative failure. Finally, conventional cements work well in situations that don’t allow for the best moisture control.
Bonding to Dentin
Bond strength becomes especially important when only a limited amount of enamel is available for bonding, as with teeth worn down by bruxing, dietary habits or acid reflux. The traditional view that placing a restoration on dentin requires conventional cement no longer holds true: a high-quality adhesive cement can effectively do the job. The potential collapse of dentinal tubules makes dentin somewhat less predictable than enamel, so clinicians should take care to follow instructions precisely when using adhesive cement to bond to dentin.
Qualities to Look For
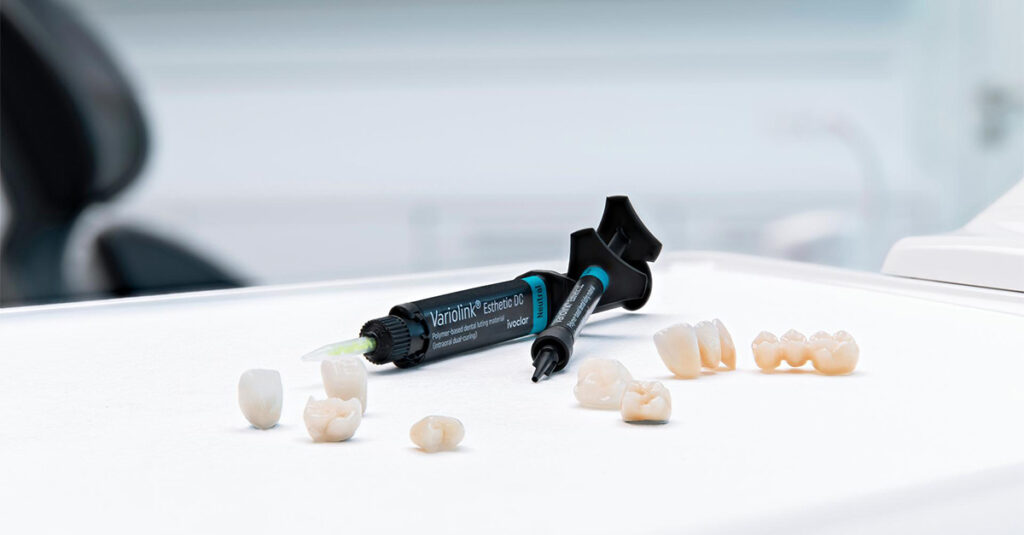
When selecting an adhesive cement, I look for a versatile, colour-neutral cementation, simplified shade matching, and gradual brightening or lightening. For retentive preparations involving IPS e.max® ceramics, my go-to cement is Variolink Esthetic, an esthetic resin cement that offers light-cure and dual-cure options. With a life-like fluorescence and six different shades/values, it can gradually brighten or darken the restoration to match the surrounding teeth. Its thixotropic properties optimize handling and flow, and its gel-like consistency following tack curing enables easy excess removal.
Process and Product
Here’s an overview of the adhesive cementation protocol and products I rely on in my practice.
- Using IPS e.max Lithium Disilicate: we ensure the restoration is lab etched – or we etch it in our office. After try-in, we clean the restoration with Ivoclean, applying it to the restoration and allowing it to react for 20 seconds, then rinse and dry. Following this step we apply Monobond Plus, allow it to react for 60 seconds, and air dry. Finally, we apply the adhesive cement inside the restoration.
- Using Zirconia: we use the three-step APC protocol1 for the restoration, which optimizes bond strength: 1) air abrasion with a 50-micron aluminum oxide, 2) MDP-containing primer such as Monobond Plus, and 3) Variolink Esthetic adhesive cement. Note: due to the opacity of the Zirconia material, which can prevent proper light curing, you must pair it with a Dual Cure cement such as Variolink Esthetic DC.
- Preparing the tooth:Moisture control is key to successful bonding. The process begins with isolation and pumice, followed by a 37% phosphoric acid etch on the enamel. Next, we apply Adhese Universal bonding agent, scrub for 20 seconds, air-thin it until the surface no longer moves, and cure it for 10 seconds. We don’t skip the curing step because lack of curing of the adhesive layer weakens the bond strength.
- Completing the procedure: The restoration is seated onto the tooth and tack-cured buccally and lingually. After cleaning up the excess cement, we apply a glycerin gel such as Liquid Strip to the margins and cure the restoration for 20 seconds per segement.
1. Blatz MB et al. Compend Contin Educ Dent 2016;37:611.