Introduction
Since Dr. Charles Pincus invented the dental veneer in 1928, popular restorative materials used and techniques employed have changed numerous times. Trends initially dictated minimal to no tooth preparation, migrated to aggressive preparation, and have now returned to an emphasis on minimizing removal of healthy tooth structure. Esthetically driven dental consumers often present with a list of expectations for treatment methods and results based on their own internet research. While these expectations are high, advances in cosmetic dentistry techniques and materials have provided cosmetic dentists with the armamentarium to meet virtually any reasonable request with incredible accuracy. Proper attention to treatment planning coupled with excellent communication between the patient, the dentist, and the ceramist yields excellent results. Porcelain veneers are often the most beautiful and durable esthetic enhancements a dentist can offer a patient, but they are only as strong as the sound treatment plan of which they are a part.
Chief Complaint and History: Medical and Dental
The patient was a 22-year-old female in excellent health. She states that she has just completed full orthodontic treatment, has annual dental cleanings, has whitened her teeth in the past, and has no other particular dental concerns outside of the esthetic appearance of her smile. Following completion of orthodontic treatment for functional reasons, the patient was particularly unhappy with the overall appearance of her smile (Figs. 1-5). She did not like the size, shape, or colour of her maxillary anterior teeth. Improper spacing and proportions, pathologic incisal wear, and developmental peg laterals were of paramount concern (Figs. 3-5). She stated that she did not want an “artificial” looking smile and that achieving a beautiful, natural result was her ultimate goal.
Fig. 1

Fig. 2

Fig. 3

Fig. 4

Fig. 5

A full-mouth series of periapical radiographs was made of the patient’s teeth and no pathology was noted. Occlusion was also evaluated to rule out any possible traumatic interferences that would affect the longevity of new restorations. 2 Canine guidance was observed without noting any posterior excursive interferences.
The clinical examination revealed a Class I molar and canine relationship with no significant occlusal interferences. Evidence of significant wear was found on the patient’s anterior teeth, and after evaluation of occlusion, it was determined that this process of pathologic wear appears to have been addressed and eliminated through orthodontic treatment. The patient exhibited no symptoms of any temporomandibular disorder and appeared asymptomatic during4 a TMJ evaluation. 2
Diagnosis and Treatment Plan
The patient’s dentition exhibited wear, anesthetic tooth shape, excessive maxillary spacing, and poor tooth size proportions. 1 The patient had a Class I occlusion with a history of mild pathologic wear prior to orthodontic correction.
Diastemata remaining due to the patient’s tooth size/space discrepancy following completion of orthodontic expansion allowed for consideration of primarily additive dentistry as a preferred restorative option. Following discussion of esthetic restorative options for her smile, the patient elected to pursue tray bleaching of her maxillary and mandibular teeth, followed by treatment of teeth #6, 7, 8, 9, 10, and 11 with minimal preparation porcelain veneers. She stated that she was excited by the idea of having her teeth restored in a conservative manner without having to remove an excessive amount of natural tooth structure. The patient said that a natural, beautiful result was her primary goal. Proper care for the future porcelain restorations was discussed, including nightly wear of a maxillary full arch hard protective occlusal guard, and the importance of optimal maintenance, including regular cleanings and examinations, was stressed. 3
A comprehensive set of records was made of the patient’s preoperative condition to allow for proper communication between the dentist and the ceramist. A lab prescription was filled out including the patient’s complaints and proposed changes for her smile. In addition to the information provided to the ceramist, the operator made a telephone call to the ceramist to discuss the details of the case. Alginate impressions of both the maxillary and mandibular arches were made and study models were fabricated in die stone. 3,4,5,6 A Futar D Fast polyvinyl siloxane bite registration (Kettenbach Dental; Eschenburg, Germany) was made, along with numerous digital photographs meticulously documenting the preoperative shade, texture, and shape of surrounding teeth. 3,4,6,7 A facebow transfer was done as well. The study models were mounted on a semi-adjustable articulator and teeth #6, 7, 8, 9, 10, and 11 were waxed to full contour. A putty polyvinyl siloxane stent was then formed to fabricate an incisal reduction matrix. Custom whitening trays were also fabricated from the study models and delivered with 10% Opalescence PF whitening gel (Ultradent Corp; West Jordan, UT) and instructions for use at the initial records appointment.
Description of Treatment
On the day of her preparation appointment, the patient reviewed the proposed plan for restoration of her smile. She approved the waxed teeth presented on mounted study models prior to any preparation of her teeth 3,4 (Figs. 6 & 7). Following approval of the wax models, shade selection was performed immediately to insure proper match of hue, chroma and value, prior to any dehydration of the teeth that would occur during the treatment process. 3,4 Under colour corrected lighting, digital photographs were made from multiple angles with at least two shade tabs per photograph, to assist in shade matching and color mapping. 4 A shade map was also produced by the dentist to be used as a complimentary guide with the photographs for the ceramist.
Fig. 6

Fig. 7

Profound anesthesia was obtained through the use of a topical anesthetic, followed by injection of articaine anesthetic with 1:100,000 epinepherine in the areas of #6-11. Tooth preparation was completed with a LVS4 coarse/fine two grit diamond bur (Brasseler USA; Savannah, GA) in a high-speed handpiece under copious water spray. Due to the size and positioning of the patient’s teeth, minimal tooth reduction of the patient’s enamel was required (Fig 8). Establishment of a well-defined cervical margin to provide for a precise, smooth, and easily cleansable porcelain to tooth interface was the most critical preparatory element. 3,4 Abrasive discs (Cosmedent Inc.; Chicago, IL) in a slow-speed handpiece were used to smooth the preparations and eliminate any sharp angles that could provide for internal stress points in the porcelain restorations. 3,4 Appropriate incisal reduction was confirmed with the lingual and incisal polyvinyl siloxane stent. Photographs of the preparations were made and a preparation shade of st9 (Ivoclar Vivadent; Amherst, NY) was observed and recorded to be communicated to the ceramist (Fig. 9). Expa-syl gingival retraction paste (Acteon Inc.; Mount Laurel, NJ) was expressed around all gingival margins to provide hemostasis and adequate tissue reflection for the master impression. After three minutes, the paste was rinsed away with a copious, forceful water spray. The preparations were dried and a master polyvinyl impression was made with Honigum Light and Heavy impression material (DMG America; Englewood, NJ). A Futar D Fast (Kettenbach Dental; Eschenburg, Germany) stick bite of the prepared teeth in centric occlusion was made and photographed. All impressions were then disinfected and sent to the laboratory with the photographic records and instructions for the ceramist.
Fig. 8

Fig. 9

The patient’s teeth were then lubricated with a thin layer of glycerin gel. The polyvinyl siloxane stent made from the diagnostic wax-up was filled with BL Luxatemp (DMG America; Englewood, NJ) and placed over the prepared teeth and allowed to cure. After approximately one minute, the stent was gently removed with the veneer provisionals remaining inside. Excess material was scaled away from the teeth and the teeth were cleaned with pumice. The provisionals were removed from the stent and trimmed. The provisional restorations were then seated with Optibond FL resin (Kerr Corp; Orange, CA) and cured for five seconds on each tooth with the Bluephase 20i LED curing light (Ivoclar Vivadent; Amherst, NY). Excess material was removed with a scaler and a #12 scalpel blade, and the provisionals were smoothed and finished with abrasive discs (Cosmedent Inc.; Chicago, IL) and a rubber cup polisher (Cosmedent Inc.; Chicago, IL). Occlusion was verified and checked, and the patient was appointed for a post-operative check 24 hours later.
The 24-hour post-operative check-up appointment began with an esthetic and phonetic evaluation by the patient and doctor. The 24-hour check was particularly important because it was the patient’s first opportunity to evaluate the proposed shapes and contours of her new teeth in an unanesthetized state. The patient reviewed and approved the shape of her provisional restorations and the shade tabs selected at the prior appointment. Proper occlusion and anterior guidance were confirmed. Photographs of the approved provisional restorations and shade tabs were made. Other provisional records were made including a Futar D Fast stick bite (Kettenbach Dental; Eschenburg, Germany) in centric occlusion and a Honigum polyvinyl impression (DMG America; Englewood, NJ) of the approved provisionals. All records were then disinfected and sent to the ceramist, accompanied by a completed laboratory prescription and all photographs taken to this point. The ceramist was instructed to use the impression of the approved provisionals as a guide for the final shape, size, and contour of the porcelain restorations.
Laboratory Phase
During the three-week provisional phase following the master impression appointment, the patient was able to further reevaluate the provisional restorations. If she had requested any changes, they would have been communicated to the ceramist during this period. No changes were requested during this time.
The patient’s approved basic shade choice of BL2 (Ivoclar Vivadent; Amherst, NY) with a slight fade to BL3 at the gingival (more on #7 and 10 than the centrals) and a cervical BL4 on the canine teeth was communicated to the ceramist on the complete laboratory prescription. A moderate incisal translucency pattern was requested with natural gingival staining and a polished gloss lightly textured finish. Additional information sent to the laboratory included the following:
- Shade map (proposed)
- Digital Photographs: Pre-op, Prepped, Provisionalized
- Digital Photographs of teeth with shade guides: Pre-op, Prepped, Provisionalized
- Stick bite registrations with photographs: Pre-op, Prepped, Provisionalized
- Master polyvinyl siloxane impression of prepped teeth (two sets)
- Opposing polyvinyl siloxane impression of mandibular teeth
- Polyvinyl siloxane impression of maxillary provisional restorations
- Specific written details of case goals with special emphasis on shade. At this time a prescription for 6 IPS e.max Porcelain veneers (Ivoclar Vivadent; Amherst, NY) was written. On receipt of the case, the records were reviewed by the ceramist and the material choice on the prescription was confirmed during a telephone conversation. Shape, shade, and characterization were discussed again and finalized in the planning stage.
Cementation
On return from the ceramist, the porcelain restorations were inspected on the dies for marginal fit and on solid models for proper interproximal contacts (Figs. 10-13). They were also inspected under magnification for any possible packing and shipping damage. Profound anesthesia was obtained through the use of a topical anesthetic followed by injection of articaine anesthetic with 1:100,000 epi in the areas of #6-11, and the provisional veneers were removed with a scaler and hemostats. An Optragate retractor (Ivoclar Vivadent; Amherst, NY) was applied to isolate the prepared teeth from the oral environment. The preparations were pumiced and scrubbed with Consepsis chlorhexidine (Ultradent Corp; West Jordan, UT) to clean off any residual resin temporary material or debris (Figs. 14 & 15). The veneers were then tried into the patient’s mouth and evaluated for fit and esthetics (first individually, then collectively). No adjustment was noted and the patient approved the esthetic appearance.
Fig. 10

Fig. 11

Fig. 12

Fig. 13
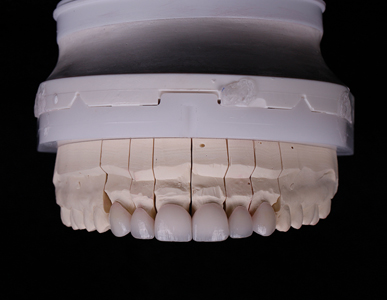
Fig. 14

Fig. 15

The veneers were removed from the patient’s mouth and carefully cleaned and re-etched to remove any possible contamination. The veneers were then placed in an ultrasonic cleaner under distilled water for a duration of three minutes. On removal from the water, they were dried with oil-free compressed air and Monobond Plus silane coupling agent (Ivoclar Vivadent; Amherst, NY) was applied to the intaglio of the veneers. 8 Following one-minute, they were dried again and a thin coating of All-Bond Universal bonding agent (Bisco Dental; Schaumburg, IL) was applied to the inside of the veneers and air thinned. Vitique Translucent Veneer Cement (DMG America; Englewood, NJ) was then applied to the veneers and they were immediately placed into a ResinKeeper light-safe box (Cosmedent Inc.; Chicago, IL) to prevent polymerization of the resin. 3,4
The preparations were then acid etched for a duration of 15 seconds and the 35% UltraEtch phosphoric acid gel etchant (Ultradent Corp; West Jordan, UT) was removed with a copious air and water spray 3,4 (Figs. 16 & 17). All preparations were lightly dried, but not desiccated with oil-free compressed air. 3,4 The preparations were left moist and bonding agent was then applied to each preparation and agitated for 20 seconds prior to air thinning to evaporate solvents (Figs. 18 & 19). The bonding agent was then cured for 20 seconds with a Bluephase 20i LED curing light (Ivoclar Vivadent; Amherst, NY). The veneers were then removed from the light-safe box and seated on their respective preparations (Fig. 20). Excess cement was removed with a Regular Microbrush (Microbrush; Grafton, WI) and they were tacked into place for five seconds each with the LED curing light. 9 Additional excess cement was removed gently with a scaler, floss was passed through the contacts in the apical direction only, and the veneers were then cured fully for an additional 30 seconds each 9 (Fig. 21). The margins were then inspected and any excess cured cement was removed with a #12 scalpel blade. 9 Interproximal areas were cleaned with Epitex finishing strips (GC America; Alsip, IL). DeOx oxygen inhibiting gel (Ultradent Corp; West Jordan, UT) was then placed around all margins and the restorations were cured an additional 10 seconds to finalize polymerization 3,4,8 (Figs. 22 & 23). Excess cured resin cement was removed with an LVS8 red fine football diamond (Brasseler USA; Savannah, GA) (Fig. 24). Optragate isolation was then removed and occlusal marking paper was used to evaluate the occlusion in centric occlusion and in excursive movements. The lingual aspect was then polished with diamond paste and Flexibuff polishers (Cosmedent Inc.; Chicago, IL) in a slow speed handpiece.
Fig. 16

Fig. 17

Fig. 18

Fig. 19

Fig. 20

Fig. 21

Fig. 22

Fig. 23

Fig. 24

The patient’s teeth were inspected again for any excess restorative material. The occlusion was checked again and smooth, proper contacts were verified with un-waxed floss. Post-operative home care instructions were given and the patient was scheduled for a follow-up appointment for radiographic and photographic documentation, as well as a final check for function and esthetic evaluation (Figs. 25-28).
Fig. 25

Fig. 26

Fig. 27

Fig. 28

The patient returned the following day and her functional occlusion was evaluated and her teeth were inspected for any residual cement. Also, at the 24-hour post-operative check appointment, maxillary and mandibular alginate impressions were then made along with a polyvinyl siloxane bite registration to be used for fabrication of a maxillary full-arch bite guard for night time wear. 3
Post-operative home-care instructions were given and the patient was scheduled for a follow-up appointment for radiographic and photographic documentation. Also, a final check was performed for function and esthetic evaluation, and delivery of the patient’s maxillary protective bite guard. 3
Fig. 29

Fig. 30

Fig. 31

Fig. 32

Fig. 33

Fig. 34

Fig. 35

Conclusion
Porcelain veneers can be employed to provide beautiful, natural, and long-lasting functional cosmetic results. Careful planning, great communication, and meticulous use of contemporary dental materials yielded an excellent result that surpassed the patient’s expectations (Figs. 29-35). OH
Oral Health welcomes this original article.
The author would like to thank Wayne Payne, MDT, AAACD, for his laboratory excellence and collaborative support.
References
- American Academy of Cosmetic Dentistry. Diagnosis and Treatment Evaluation in Cosmetic Dentistry: A Guide to Accreditation Criteria. Madison (WI): The Academy; 2001.
- Dawson, Peter E. Evaluation, Diagnosis, and Treatment of Occlusal Problems. The C.V. Mosby Co.: St Louis, MO; 1989.
- Magne, Pascal. Bonded Porcelain Restorations in the Anterior Dentition A Biomimetic Approach. Quintessence Books: Chicago, IL; 2002.
- Gurel, Galip. The Science and Art of Porcelain Lamanate Veneers. Quintessence Books: Chicago, IL; 2003.
- Rufenacht CR. Fundamentals of Esthetics. Quintessence Books: Chicago, IL; 1992.
- Fradeani, Mauro. Esthetic Analysis A Systematic Approach to Prosthetic Treatment Volume 1. Quintessence Books: Chicago, IL; 2004.
- Goldstein, Ronald E. Esthetics In Dentistry. B.C. Decker, Inc.: Hamilton, Ontario; 1998.
- Touati B, Quintas AF. Aesthetic and Adhesive Cementation for Contemporary Porcelain Crowns. Practical Procedures in Aesthetic Dentistry. 13(8): 611-620, 2001.
- Miller, Michael B. Reality: The Techniques: Volume I. Reality Publishing Co.: Houston, TX; 2003.
About the Author
 Dr. Rowe maintains a private practice dedicated to excellence in general, cosmetic, and complex restorative dentistry located in Jonesboro, Arkansas. He is an Accredited Member of the American Academy of Cosmetic Dentistry, past member and Chairman of the American Board of Cosmetic Dentistry, and is currently the AACD’s Chairman of Accreditation. He also serves as an Accreditation Examiner for the American Academy of Cosmetic Dentistry. Dr. Rowe has been awarded Fellowships in the International College of Dentists and the Pierre Fauchard Academy. He is a graduate of the University of Tennessee College of Dentistry, and is a formally trained artist having graduated from Washington and Lee University with a Bachelor of Arts degree in Studio Art. Dr. Rowe enjoys sharing his passion for cosmetic dentistry materials and techniques, lecturing nationally and internationally, and can be contacted through his office at info@rowesmiles.com or 870-932-4126.
RELATED ARTICLE: Evolving Excellence: Scientific Advances In Dentistry And New Restorative Paths
Follow the Oral Health Group on Facebook, Instagram, Twitter and LinkedIn for the latest updates on news, clinical articles, practice management and more!