
Matching odd shades (particularly if they do not appear in shade guides) can be a challenging task for a dental professional. A skillful practitioner who is familiar with principles of colour
(Value, Chroma, Hue and Translucency) and composite systems, colour modifiers and shade matching principles, can create and match a restoration to the existing dentition utilizing standard materials available to the esthetic dentist.
Case Report
The patient presented with the chief complaint, “I was eating salad and I heard my tooth crack” and pointed to tooth 21 (Figs. 1 & 2).
Fig. 1

Fig. 2

Upon obtaining radiographs and a CBCT scan, various treatment options were reviewed with patient. All risks, benefits, limitations and the prognosis of each treatment option were discussed. Ultimately the patient decided to have the tooth extracted and replaced with a dental implant crown (Figs. 3 & 4).
Fig. 3

Fig. 4

An attempt was made to choose the shade of the final restoration prior to beginning the dental procedure. It was noticed that the adjacent shades were not among those that were included in regular shade guides (Vita Classic, Vita Toothguide 3D-Master, and Premise Kerr).
Tooth 21 was extracted under oral conscious sedation with the least traumatic technique utilizing periotome elevators. A BioHorizons Tapered Internal Plus LaserLok implant, 4.6 X 12mm, 3.5 mm platform, implant was inserted. This specific implant was chosen to enable platform switching. Another criterion was its LaserLok characterization at its cervical area. The osteotomy site was prepared palatal to the existing anatomical socket, based on guidance from the CBCT scan (Figs. 5-7).
Fig. 5

Fig. 6

Fig. 7

Upon the insertion of the implant, the Osstell IDx RFA (Resonance Frequency Analysis) was used to assess the ISQ (Implant Stability Quotient). The value of 76 revealed an acceptable bone-implant interface. It was determined that immediate loading was feasible (Figs. 8 & 9).
Fig. 8

Fig. 9

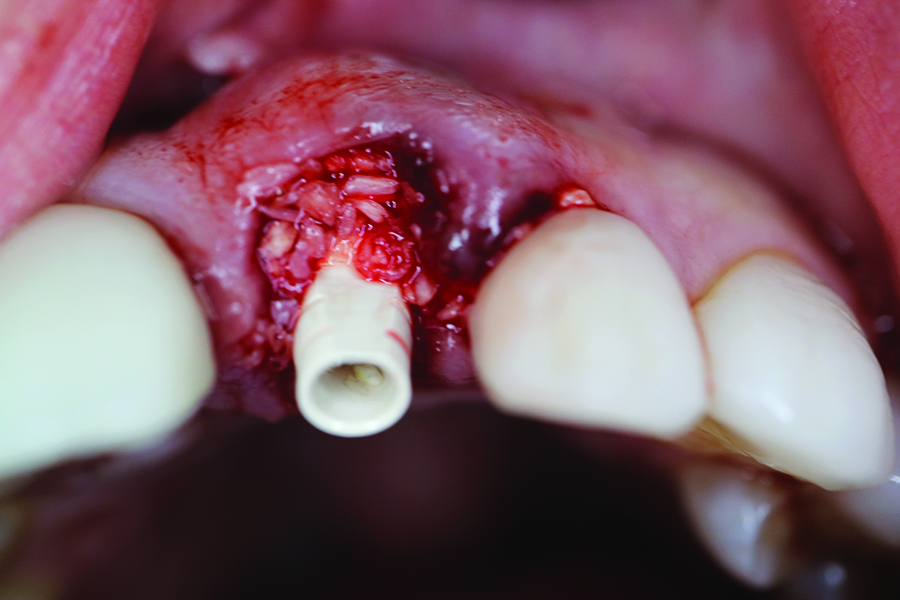
Upon implant insertion, a provisional Peek Plastic Abutment was placed, and the abutment screw was finger tightened. The gap between the implant body and the facial bone plate was filled with Allograft, MinerOss 0.6-1.25 mm, 0.5 cc mixed with Clindamycin 300 mg, 2ml (Fig. 10).
Fig. 10
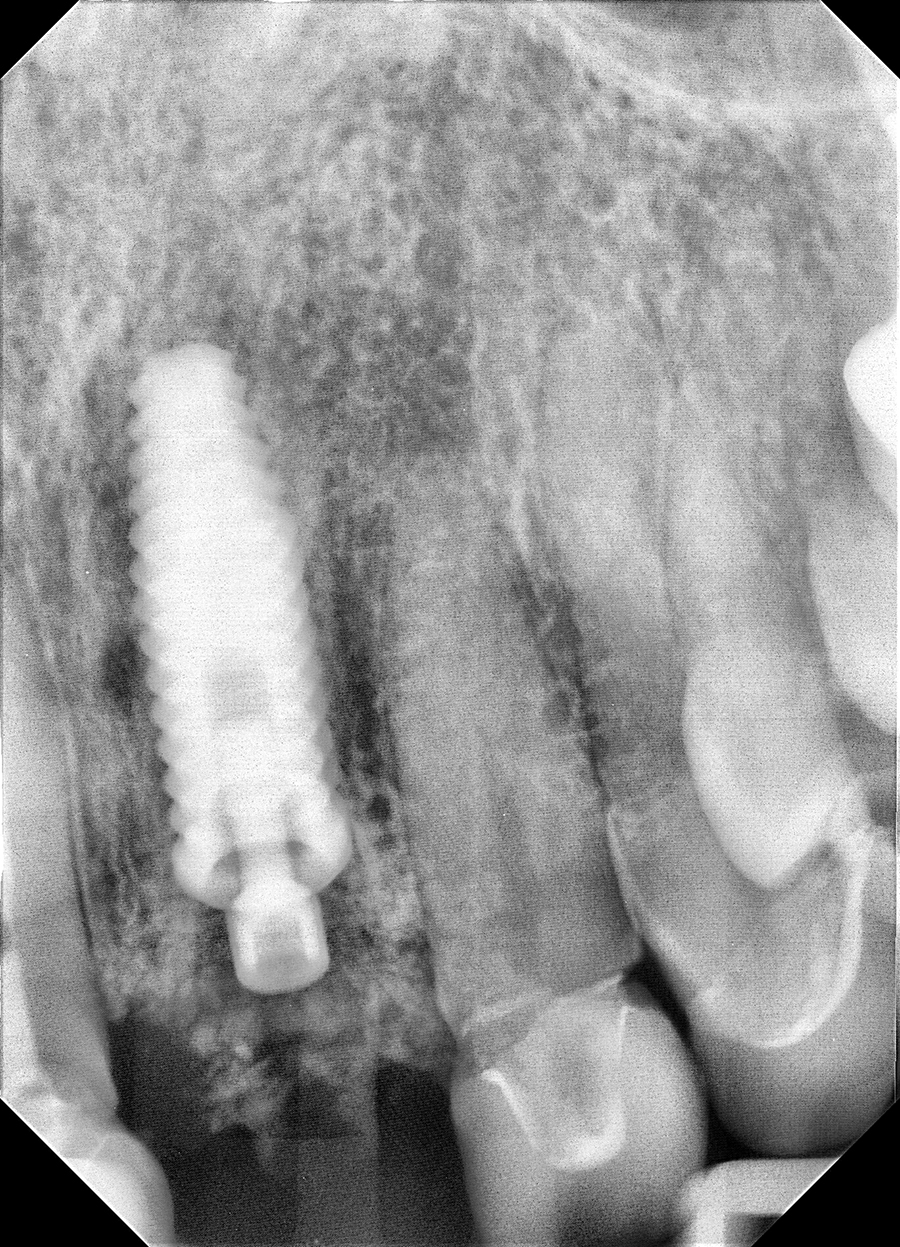
A periapical radiograph confirms proper positioning of the implant placement and the bone augmentation (Fig. 11).
Fig. 11
A Polycarbonate Provisional Crown (ION Crown) was relined with Jet acrylic to fabricate a cement retained provisional restoration. It is of great importance to remove all residual cement particles (Figs. 12-14). The option of a screw-retained provisional should be a considered as an alternative to avoid any risk of cement contamination and its consequent complications.
Fig. 12

Fig. 13
Fig. 14
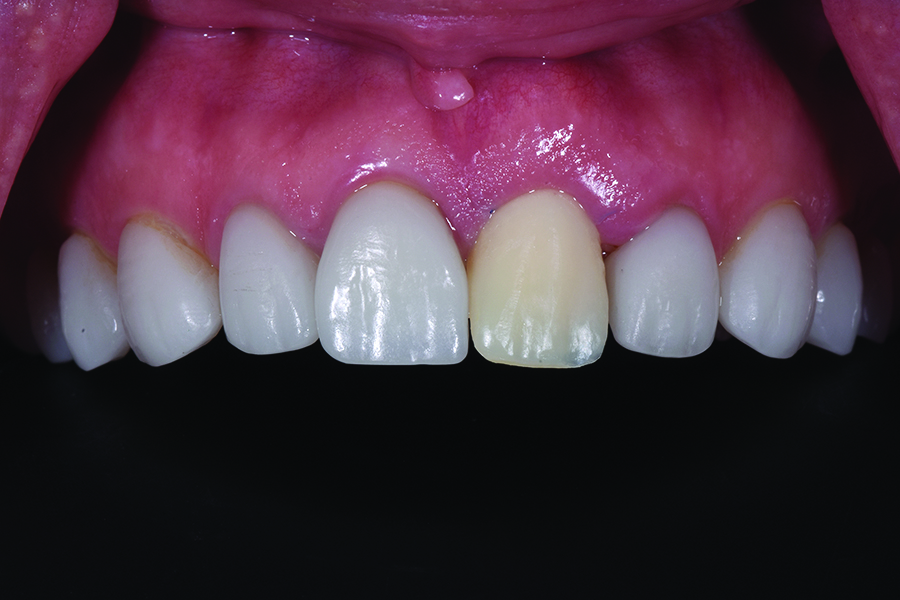
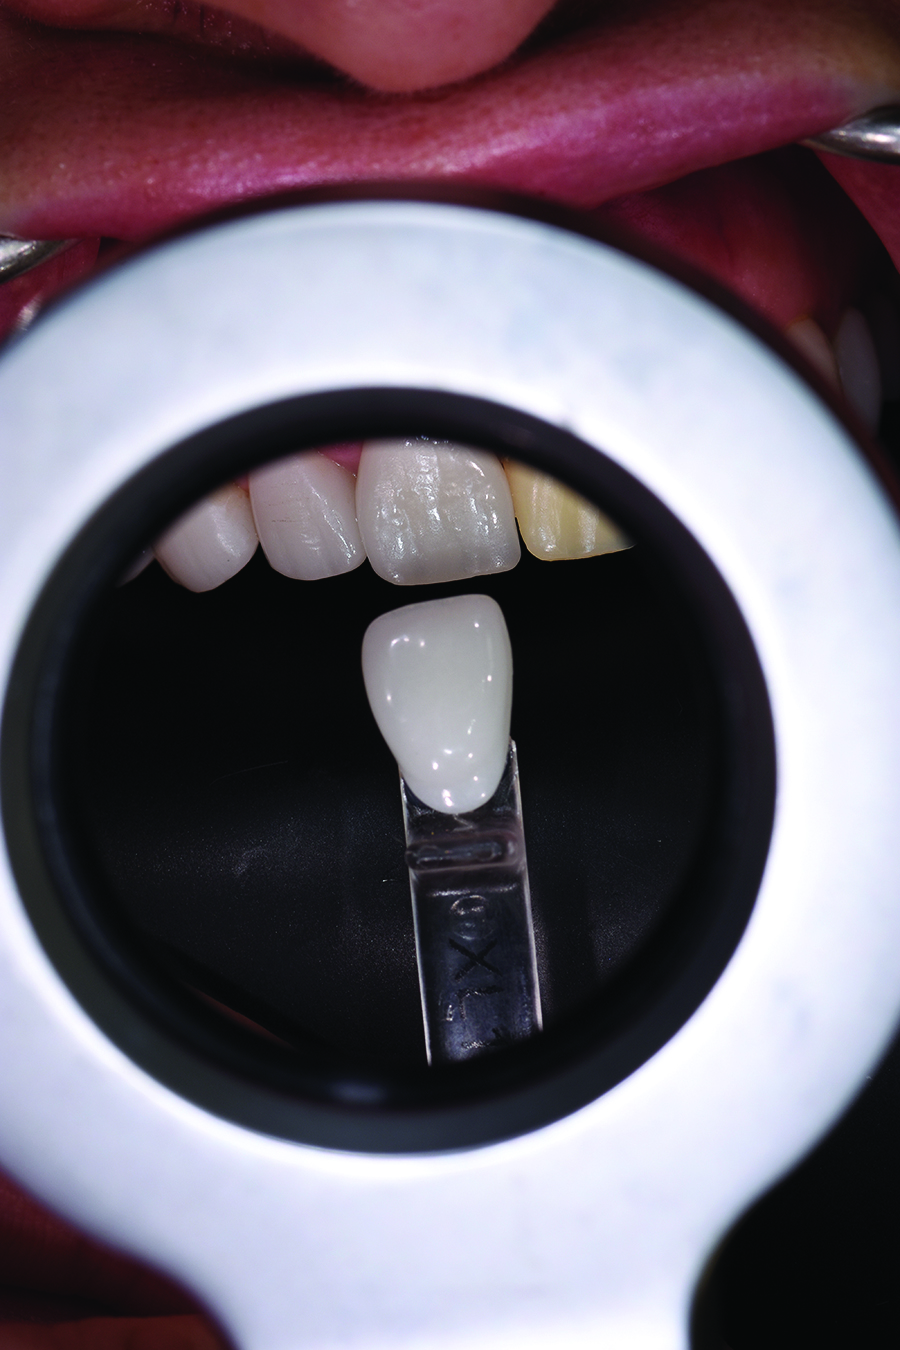
Upon examination of the shades of the adjacent dentition, it was noted that the patient’s anterior dental restoration shades did not match any of the universal shade guides.
By using a colour corrected light source to eliminate ambient inconsistencies, and by following the accepted principles of shade matching, the Value, Chroma, Hue and Radiolucency of existing restorations were determined (Fig. 15).
Fig. 15
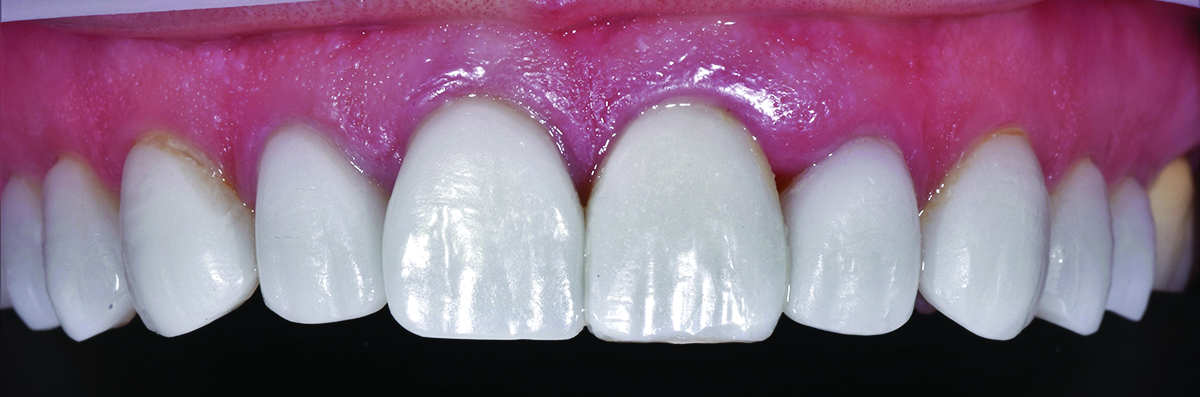
Utilizing the appropriately selected composites based on observed value and with the addition of colour modifiers (Kolor Plus, Kerr), shade matching was completed. In this case, five attempts were required before the proper colour match was achieved. The selected composite shade was mixed with differing amounts of colour modifiers based on the chroma and hue of the existing
restorations to create an esthetically acceptable shade match (Figs. 16-18).
Fig. 16

Fig. 17

Fig. 18
Oral Health welcomes this original article.
About the Author
 Dr. David Mazza was awarded the Certificate of Advanced Graduate Study (CAGS) at Boston University, and is currently a
Clinical Assistant Professor at Maryland University School of Dentistry, where he has twice received the Award in Teaching Excellence. He is a Diplomate of the ICOI (International Congress of Oral Implantologists) and a Fellow at the International Academy for Dental and Facial Esthetics. Dr. Mazza lectures nationwide at symposiums and study clubs.
RELATED ARTICLE: Dynamic Navigation: Predictable Implant Placement In Close Proximity To Sinus Floor
Follow the Oral Health Group on Facebook, Instagram, Twitter and LinkedIn for the latest updates on news, clinical articles, practice management and more!


