Many dentists regularly face demanding cases like veneer placements, where both esthetic challenges and patient expectations are high. Below, we will demonstrate how using the right techniques and materials can facilitate the adhesive cementation of veneers, making the procedure simple and successful.
Veneers are among the most common treatments in dentistry, and for a good reason. These thin ceramic coverings are the result of expert craftsmanship, and their placement in the oral cavity is just as demanding as their creation.
“The quality of intraoral cementation has a decisive impact on the esthetic outcome and long-term stability of restorations.”
The adhesive technique is the only approved cementation method for veneers. While the adhesive cementation procedure presents some challenges, it nonetheless delivers reliable and esthetically pleasing results. Because of the delicate structure of veneers and the precision required for their proper placement, there is little room for error. Various challenges are involved, including choosing the right luting material, ensuring correct placement on the tooth and managing the simultaneous handling of several veneers. Overall, the procedure requires practice, skill, a precise protocol and a technically advanced luting material.
The solution for everyday clinical practice
This is where Variolink Esthetic (Ivoclar) comes into play: a modern luting material that enables a precise application method due to its optimized viscosity and thixotropic consistency. These two features make intraoral veneer placement less stressful and more comfortable, and below, we explain why.
Read related article: Technology and Emotion: A Porcelain Veneer Case Report
Why consistency matters
The consistency of the luting material plays a crucial role in everyday clinical practice. An ideal cementation material should be firm enough to prevent running during application, yet fluid enough to allow the precise positioning of the veneer on the tooth. Variolink Esthetic features a specially designed thixotropic consistency that does just that, making it easy to place it exactly where it is needed. What makes it special: When pressure is applied, the material becomes more fluid, and once the pressure is released, it solidifies again. The latest generation of the light-curing variant, Variolink Esthetic LC, has been further improved to offer even better viscosity. For instance, the optimized viscosity provides users with enhanced tactile feedback: When the veneer is placed correctly on the tooth, a noticeable resistance is felt.
“Tactile feedback provides dentists with complete control during every veneer placement, ensuring maximum precision.”
Technical details and improvements
Variolink Esthetic LC stands out for its technologically advanced features. The specific interaction between the fine-grained, spherical fillers and the monomer matrix is responsible for the remarkable thixotropic behaviour of Variolink Esthetic LC. In spite of its stable consistency, the material becomes flowable when pressure is applied – such when extruding it from the syringe or during restoration placement. As soon as the pressure is released, it returns to a stable state. This property facilitates excess removal and reduces the risk of residue flowing into the sulcus.
Veneer placement with Variolink Esthetic LC – Case report by Dr. Roberto Turrini
Esthetic improvement using a non-prep veneer
“For many years, I have relied on Variolink Esthetic because it has consistently proven effective for the adhesive cementation of various restorations. I have now standardized the workflow for myself and my team with a uniform cementation protocol.”
Adhesive dentistry allows us to perform many of today‘s restorative treatments using minimally invasive methods. Whether using prep or non-prep techniques, we can achieve nearly perfect results. Minimally invasive preparation methods, such as those for veneers, are key to preserving healthy tooth structure. The selection of materials is essential for achieving successful outcomes. This includes not only choosing the right restoration material but also the right luting composite.
Initial situation
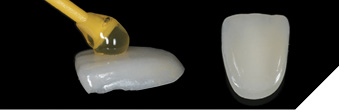
The patient requested an esthetic improvement of his anterior region. He was unhappy with the position of his central incisors. After orthodontic treatment, a misalignment had developed and needed to be corrected using minimally invasive methods (Fig. 1). After examining the position, shade and stability of the hard and soft tissues, we decided to treat the case with a non-prep veneer made from lithium disilicate for tooth 21. For the restoration material, we chose IPS e.max Press HT (Ivoclar) because of its impressive esthetic properties (Fig. 2). The veneer was produced by dental technician Roberto Della Neve in Naples (Italy).
Fig. 1
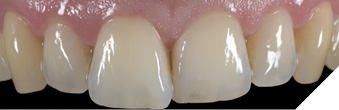
Fig. 2
Before placing a rubber dam, I tried in the veneer to ensure that there were no interferences affecting its placement. In addition to verifying the fit, I assessed the esthetic qualities of the veneer. A try-in paste (Variolink Esthetic Try-In, Ivoclar) was used to effectively simulate the shade effect. Tip: OptraStick makes it much easier to pick up and handle delicate veneers (Fig. 3).
Fig. 3
Conditioning the veneer and tooth surface
After the try-in, the veneer was etched and silanated. A single-component ceramic primer (Monobond Etch & Prime, Ivoclar) was used to etch and silanate the veneer in a single step. This eliminated the need for etching the contact surface with hydrofluoric acid. After that, the veneer was rinsed with water and dried. The tooth surface was cleaned with fluoride-free Proxyt paste and then etched with etching gel. The adjacent teeth were protected with dental Teflon tape during the procedure. After rinsing off the etching gel, the desired etching pattern became visible. Then, the adhesive (Adhese Universal, Ivoclar) was applied (Figs. 4 to 7).
Fig. 4
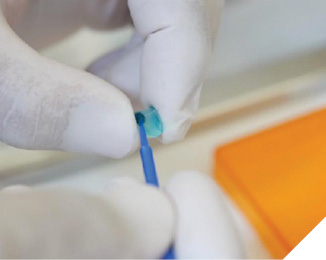
Fig. 5
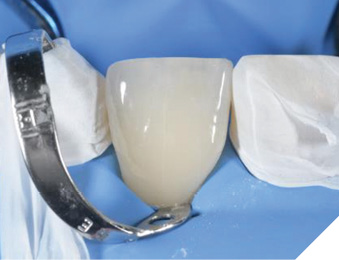
Fig. 6
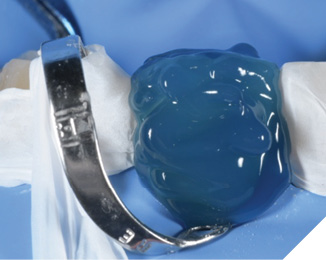
Fig. 7
Cementing the veneer
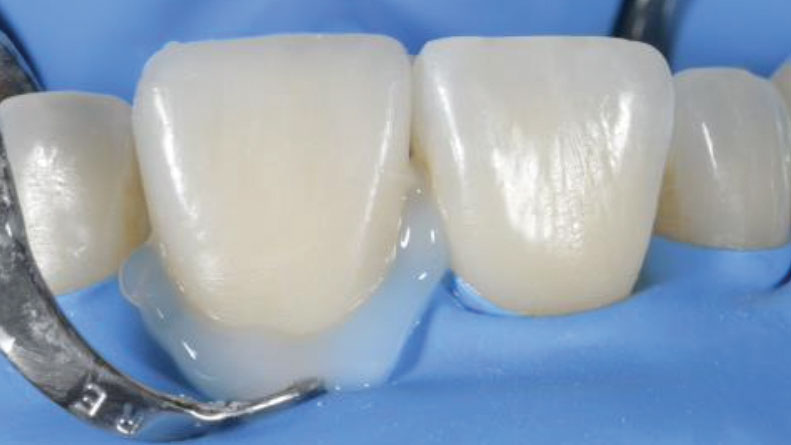
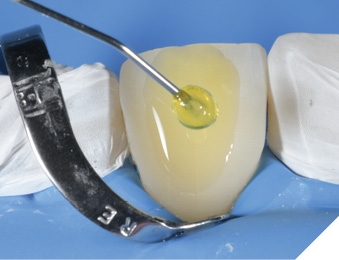
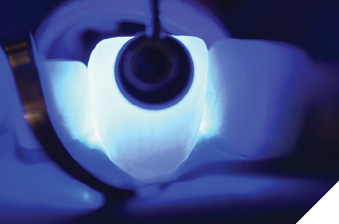
I chose Variolink Esthetic LC (neutral) for the cementation procedure. Thanks to its new high-viscosity formula, the material is now even easier to handle. It can be applied with accuracy and stays in place without spreading uncontrollably (Figs. 8 and 9). Once the veneer is correctly placed on the tooth, you can feel a slight resistance (tactile feedback). I placed the veneer using an OptraSculpt Pad, performed a brief tack cure and then removed excess cement with dental floss (Figs. 10 & 11). This was followed by final light curing (Bluephase PowerCure, Ivoclar). To prevent the formation of an oxygen inhibition layer at the restoration margins, I covered the cementation joint with glycerine gel before the final cure (Figs. 12 & 13).
Fig. 8
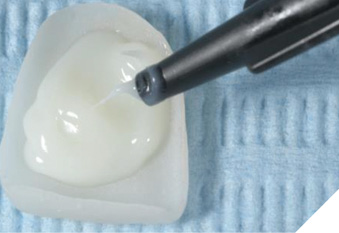
Fig. 9
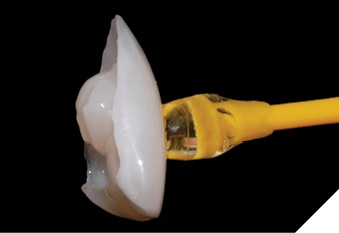
Fig. 10
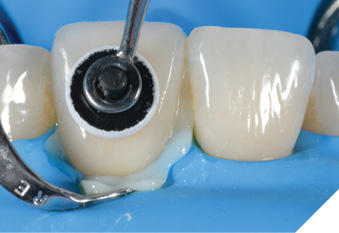
Fig. 11
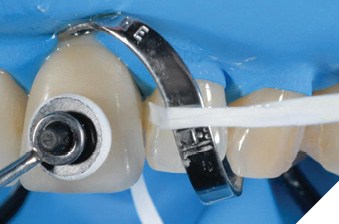
Fig. 12
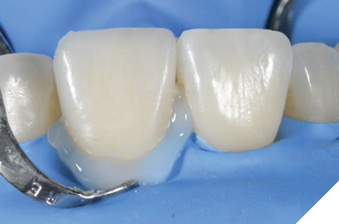
Fig. 13
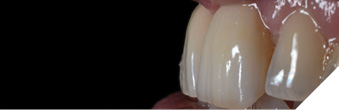
The result
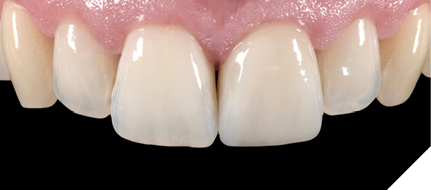
A follow-up examination was performed ten days after the placement. The tooth structure had rehydrated during that time, allowing me to assess whether the veneer had integrated successfully. Both the patient and I were very pleased with the esthetic result. The visual impression of the anterior front is beautiful and harmonious. The dainty veneer looks completely natural and unnoticeable (Fig. 14).
 Fig. 14
Oral Health welcomes this original article.
About the author

Dr. Roberto Turrini graduated in dentistry from the University of Florence in 2004. Since 2005, he has worked with Dr. Mauro Fradeani, focusing on restorative dentistry, endodontics, and prosthodontics, with a major interest in esthetic dentistry. He has authored numerous scientific articles and a book on dental bleaching published by Quintessence International in 2011, translated into several languages. A national and international speaker, Dr. Turrini lectures on prosthodontics and esthetic dentistry as a founding member of Fradeani Education.